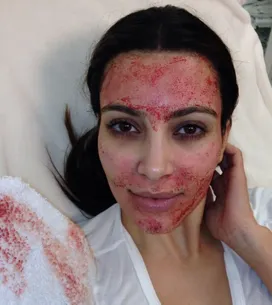
Every girl wants the same thing when it comes to fake tan. Less of the orange, more of the 'I've been sunning myself in the Seychelles for a fortnight' kinda look, but a sun kissed EVEN fake tan is just so hard to come by.
Luckily we spoke to the tanning exerts at LDN: SKINS to find out their top 10 tips on achieving the perfect golden tan so we can be rid of those patchy elbows once and for all.
1. Hair removal
Defuzz before or after? It’s the question of all questions but there just so happens to be an answer: always defuzz first.
Ensure you wax or shave at least 24 hours before applying your tan to prevent irritation or sensitivity to your open pores.
2. Exfoliate
Hands up – it’s our least favourite of the fake tan stages but when it’s done right an even golden tan you shall have.
Make sure to exfoliate at least 24 hours before applying your tan, to cleanse and polish your skin for a more even looking tan.
Use LDN: SKINS Foaming Exfoliator to remove the build up of any unwanted products. Spray tan addicts we’re talking to you.
Finish with a back spatula for all those hard to reach places.
3. Moisturise
There’s no beauty pet peeve greater than a flakey fake tan so it’s worth persevering with a hydrating moisturiser.
Pay particular attention to typical problem dry areas including wrists, hands, elbows, knees, ankles and feet to stop your tan from going patchy.
Applying Vaseline to dry areas can also protect your hairline, ears and rough patches from tide marks.
4. Clean Skin
Before application, your skin needs to be clean and dry and free of any perfume or deodorant.
5. Mitts
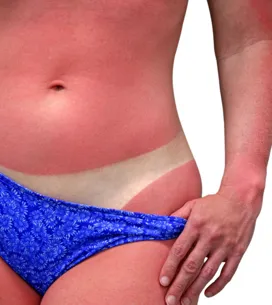
Every one’s seen the evidence of a fake tan gone wrong (hello orange hands) but if you take the necessary measures you should be safe from any disasters.
Make sure you use a tanning mitt to protect your hands from any discolouration. The Professional Tanning Mitt by LDN: SKINS makes application quick and easy with its non-slip lining. Glide and go!
6. Pump it (but not too much)
It’s easy to get carried away with product, especially when the product seems to absorb into the skin quickly. Go easy on the product as too much can lead to streaks. You can always do another coat a few days later if you need it.
7. Application
Use long circular motions combined with sweeping strokes to gently smooth the tan over your skin. There’s no need to over rub the product. Finish by dabbing away any excess off around the shoulders and legs with a tanning mitt.
8. Massage
When it comes to applying product to your face apply a small amount of product like a face moisturiser, gently massaging around your features and blending into your hairline and down your neck.
9. Don’t forget feet and hands
Make sure you gently swipe over the tops of your hands, feet and knees – remember you want a natural looking glow!
10. Aftercare
Wear loose fitting clothing afterwards and avoid any strenuous exercise. Sweat patches and streaks are hard to cover up so maybe put that HIIT class off until your tan has set. What a shame!
Have we missed a bit? Tweet us your fake tan hacks @sofeminineUK!
You might also like:
22 Stages Every Girl Goes Through With Fake Tan