A hallway swallowed by shoes is more than clutter; it’s a tiny daily negotiation between what we bring in and what we want to live with. This couple decided to stop tripping and start making—using only the timber offcuts already piling up in their shed.
The door clicked, rain freckled the slate tiles, and somewhere a sock without its twin slid under the radiator like a guilty secret. They stood in the entryway—one of them holding a carrier bag, the other cradling a drill—and took in the ankle-high chaos of trainers, boots and school pumps. The kind of mess that doesn’t look big until it gets in your way every single day. They didn’t want another flat-pack quick fix, or more plastic. They wanted a clean line of wood that could breathe, drain, and quietly belong.
They found their answer in the leftovers: a plank too short for shelving, a handful of battens, four dowels. The kettle hissed. The tape measure snapped back with a clack. The solution felt oddly simple. One small tweak changed everything.
At the threshold, small problems become loud
Most homes don’t fail in the big rooms, they snag in the first metre after the door. That’s where wet laces coil, sand dries into dust, and the day drops its weight in the corner. When a shoe rack works, it becomes a quiet habit-shaper—an eye-level invitation to reset the tone of the house.
This couple’s entryway was barely 90cm wide, so every pair mattered. They noticed patterns: muddy boots needed airflow, kids’ shoes needed a low shelf, running trainers wanted space to dry not stew. **A good rack isn’t just storage; it’s choreography for feet and time.** The best versions don’t try to hide the shoes; they stage them so you can get in, drop down, and move on.
There’s also carbon and cash in the equation. Offcuts aren’t waste until we decide they are, and wood’s embodied energy is already “spent” the moment you buy it once. By building from leftovers, you sidestep another delivery, another box, another set of fittings wrapped in plastic. And you land something sized to your life, not the catalogue. The logic is simple: use what’s there, design so it breathes, let it age.
The build, in plain English
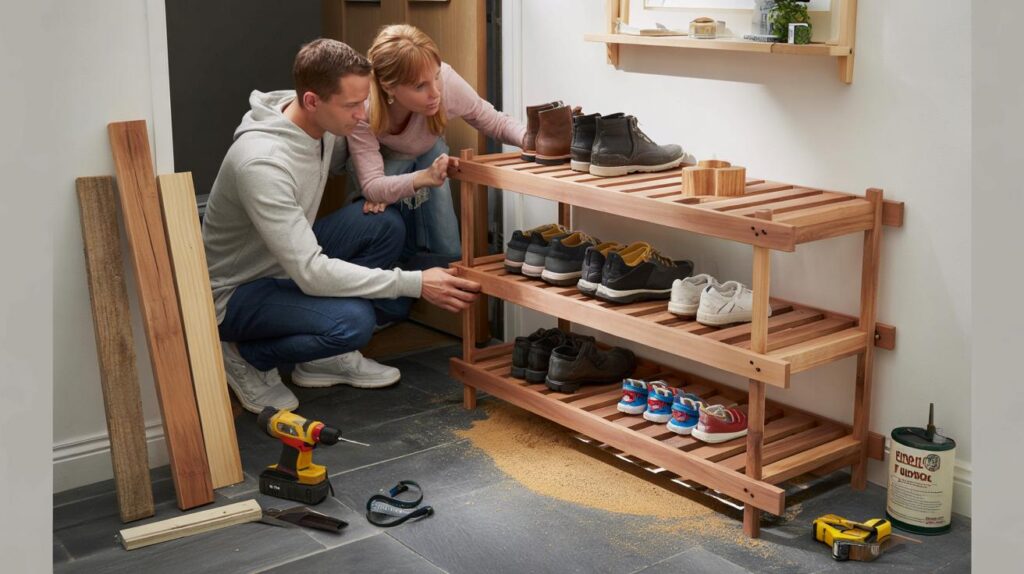
They started by auditing the pile. One board at 900mm became the top; narrower strips—about 20x40mm—turned into slats. The footprint: 900mm wide, 300mm deep, 450mm high. Side rails held the slats; four legs framed the corners. Spacing mattered: 15mm between slats invited air and let grit fall through. Pre-drill, then either dowel and glue, or use countersunk screws plugged with little wooden caps to keep a clean look.
Sanding changed everything: 120-grit to knock down the scars, 180-grit to soften the edges your hand will touch every day. For finish, they wiped on a hardwax oil so water beads rather than soaks. We’ve all had that moment when you reach for the nearest varnish and regret the plastic shine a week later. Let’s be honest: nobody really does that every day. Two light coats, twelve hours in between, and the grain woke up without shouting.
Wobble is the enemy of small furniture, and it sneaks in through tiny gaps. They squared the frame on a flat floor and checked the diagonals: if both diagonals match, your rectangle is true.
“We didn’t want perfect,” one of them told me, running a thumb along a knot, “we wanted honest—something that would take scuffs and look better for it.”
- Cut list: top 900x300mm; two side rails 900x40x20mm; two front/back rails 300x40x20mm; 8–10 slats 300x40x20mm; four legs 450x40x40mm.
- Tools: handsaw or circular saw, drill/driver, 120/180-grit paper, square, clamps.
- Finish: plant-based hardwax oil; felt pads for feet; optional hooks for keys under the top.
The result felt solid, breathable, and warm under the morning rush.
Why leftovers tell a better story
There’s a small kind of pride in transforming “spare” into “staple”. You feel it when the slats line up, when the oil deepens a knot, when yesterday’s scaffolding timber becomes the place your child drops their shoes after football. *It’s not just cheaper; it’s a way to borrow from your own past instead of the planet’s future.* Every scratch you leave out of the wood is one less mile you ask from a lorry.
And there’s a functional win in the slatted design. Shoes dry faster, smells don’t settle, and the rack stays cleaner because grit has somewhere to go. Open slats also keep the silhouette lighter, which matters in narrow hallways. If your leftover wood is mixed species, lean into it: make the slats a stripe of tones. A quiet patchwork says what flat-pack never can—that this thing was made here, for here.
Builds like this scale. One couple’s 900mm rack becomes someone else’s 600mm boot bench, or a stackable two-tier for a flatshare. **The pattern is less about measurements, more about mindset: measure the space, watch your habits, let the wood suggest the rest.** When objects hold stories, we keep them longer. The front door stops being a drop zone and starts feeling like a welcome.
By the time the rack slid into its corner, the hallway felt wider by a small but noticeable degree. The shoes formed two neat rows, toes out, edges soft. And the timber—alive with old nail holes and new purpose—seemed to settle into the house as if it had always been there. Maybe that’s the best design test: will it feel ordinary by next week? If it does, you’ve nailed it.
| Key points | Details | Interest for reader |
|---|---|---|
| Use leftovers first | Audit offcuts, design to the wood you have, avoid new purchases | Save money, cut waste, faster build |
| Slatted, breathable shelves | 15mm spacing, 20x40mm slats, open ends | Faster drying, less odour, lighter look |
| Simple, strong joinery | Pre-drill, square the frame, dowels or countersunk screws with plugs | Stable rack, clean finish, lasts longer |
FAQ :
- Can I build it without power tools?Yes. A sharp handsaw, a hand drill, and a sanding block will do. It takes longer, but the control is great.
- What wood works best from leftovers?Stable, straight pieces of pine, spruce, or hardwood offcuts. Avoid warped boards and anything soft or crumbly.
- How do I protect it from wet shoes?Use a hardwax oil or exterior oil and recoat annually. Pop a slim boot tray under the bottom slats in winter.
- How long and how much?About three to four hours of work and a day for drying between coats. Cost can be under £20 if you only buy oil and screws.
- Can renters use this without drilling walls?Yes. It’s freestanding. Add felt pads to the feet to protect floors and keep it from skidding.


Thanks for the clear cut list and the tip about 15mm spacing—airflow makes so much sense. I’ve been tripping over boots for months; this feels like a fix I can actually build this weekend. Definitley stealing the countersunk-screw + plug trick to keep it tidy.
Curious (and a bit skeptical): does hardwax oil really hold up to winter puddles and salty slush? Any long-term experience with swelling or mould under the slats? If not, what’s your best reccomendation for touch-ups over time?