Early light, wet soil, and a quiet promise: a raised bed in natural stone can turn a cold patch into a warm, working garden before spring has even arrived. The stones hold heat, the height keeps your back sane, and the whole thing looks like it has always belonged there. The question isn’t if you need one. It’s how quickly you can build it.
Steam rose from the mug while the robin watched each spadeful land with a thud. The lawn was sullen and waterlogged, the border a tangle of last year’s bravado, yet the pile of stone by the shed felt like momentum. I chalked a rectangle, lifted turf like a rug, and the ground began to show its bones.
The first stone sat in the trench like a key in a lock. A neighbour leaned on the fence, offered a half-smile, and told me his father built walls like this, by eye and by hand. By lunchtime the line of rock had a quiet logic. Something was waking under the frost.
The trick with spring is not speed. It’s warmth and timing. Natural stone stores sun, sheds rain, and gives roots a place to breathe. A raised bed out of it turns March into April.
Why a stone raised bed earns its keep
Natural stone is not just pretty. It changes the microclimate around your plants. The mass soaks up weak winter sun, then bleeds that warmth back into the soil at dusk, nudging germination along when your borders still feel like November.
The height keeps soil structure intact. Cats don’t dig it up as easily, shoes don’t compact it, and slugs have to work for a living. You also get an honest edge to mow against and a frame that won’t warp, rot, or fade with a bad summer. The bed holds a line through seasons that don’t play nice.
There’s a limit to width. If you can’t reach the middle from both sides, you’ll step in and undo your work. Aim for a bed no wider than 1.2 metres and a height of 25–45 cm, depending on your soil. Clay needs extra depth to drain; sandy plots get away with less. Orientation matters. A long side facing south grabs more sun and makes fleece and cloches far more effective.
How to build it: a simple, honest method
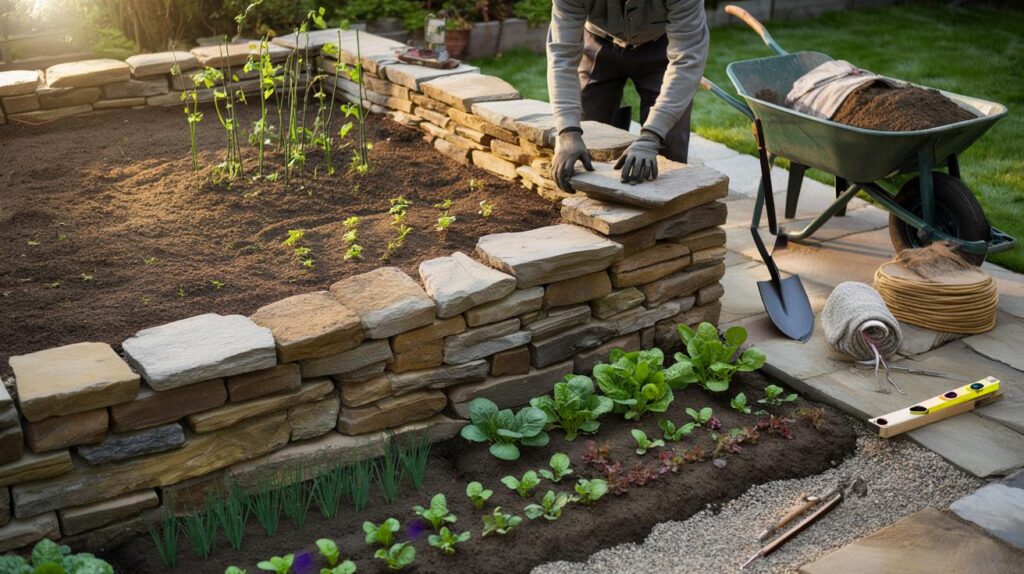
Pick a spot that gets six hours of light in spring. Mark the outline with string and pegs, then cut the turf inside and set it aside for composting. Dig a shallow trench 15–20 cm deep along the line, slightly wider than your stones. Rake it level and tamp it down. A 5–8 cm layer of compacted MOT Type 1 or coarse gravel gives you a firm, free-draining bed for the wall.
Lay your first course on a thin layer of sharp sand. Check level front to back and along the run. Stagger joints as you go, like brickwork, and lean the wall in a whisper — 5–10 mm inward per course for stability. Dry-stack for a traditional look, brushing in a clay-sand mix or soil between gaps, or use a lime mortar if you want a permanent, storm-proof edge. Dry-stack for flexibility; mortar for permanence.
Fill the bed in layers. Start with chunky organic matter: twiggy prunings, small branches, or broken-up corn stalks. Add a layer of leaves or half-rotted straw. Then a mix of topsoil and compost, at roughly 60:40, to the brim. Water it in and let it settle for a week. If it sinks, top up with compost. Geotextile at the base isn’t essential on heavy clay, but it helps stop annual weeds sneaking up from beneath.
Get the details right: drainage, soil, and spring planting
Drainage is a quiet hero. On sticky ground, punch a few soaked test holes outside your bed and watch how fast they empty. If they sulk, run a short French drain along the lowest edge and out to a soakaway, then backfill with rubble and gravel. The bed will sit above the worst of the wet, and the roots will run where they’re happiest.
Soil is your investment. Go for a loamy mix that binds but crumbles, with a dash of grit if your compost is too fluffy. Don’t chase perfect structure every weekend. Let’s be honest: nobody actually does that every day. Lay fleece on cold nights. Sow spinach, salad leaves, radish, and beetroot in short rows you can harvest fast. Slot in broad beans at the back and early peas with twiggy pea sticks. The stone makes the bed feel two weeks ahead of the rest of the garden.
We’ve all had that moment where the first seedling pokes up and we start twenty more. Resist the crowding. Plants breathe better with space, and stone walls radiate heat into little pockets where mildew hates to linger. Think in successions, not surges. Pick a small set of early crops, then re-seed the gaps as you eat. Your future self will thank you in June.
Tricks, pitfalls, and a builder’s calm
Keep your courses honest. A long spirit level saves a thousand curses later. If your stones are irregular, pair a flatter face to the top of each course so the capstones sit snugly. Where stones wobble, bed them in a thumb’s depth of sand, not a concrete blob that will trap water. Cap the top with heavier pieces for a tidy edge that sheds rain.
Common pitfalls? Going too tall, too fast. Anything over 60 cm invites collapse unless you add ties or a wider base. Skipping the base layer invites frost heave and wobbly corners. Using cement-rich mortar in a garden wall locks in moisture and flakes stone. Be kind to yourself if a course goes rogue. A raised bed is forgiving, and plants don’t file snagging lists. Take photos as you go to catch drifting levels your eye stops seeing.
Small comforts count. Keep a tarp over your soil so showers don’t turn it to paste. Stash a kneeler, a hand fork, and fleece within reach. That way you sow when the light is right, not when your shed key turns up.
“Stone makes a bed feel older than the garden,” says Jo, an allotment keeper in Bristol. “It keeps you out there on days you’d rather stay in.”
- Site: at least half a day of sun, shelter from the prevailing wind.
- Base: 15–20 cm trench, compacted hardcore, thin sand bed.
- Wall: staggered joints, slight inward lean, capstones to finish.
- Fill: woody layer, leaves/straw, 60:40 topsoil to compost.
- Plant: early greens, peas, herbs; protect with fleece on frost nights.
Spring energy, shared across the garden
A raised stone bed doesn’t live alone. It sets the tempo for everything else. Use that head start to harden off seedlings early on sunny days, then rush them back under cover by late afternoon. Tuck pots of thyme and chives along the warm edge, where bees find them on the first workable days. Clear gutters, set a water butt, and mulch the rest of your borders in rings, not blankets, so the soil wakes under sun. The bed becomes a stage you move across to prune currants, edge paths, and sow clover for pollinators.
| Key points | Details | Interest for reader |
|---|---|---|
| Stone stores warmth | Thermal mass nudges soil temperatures up and evens night-time drops | Earlier sowings and faster growth in spring |
| Solid base matters | Shallow trench, compacted hardcore, slight inward lean on courses | Wall stays stable through wet winters and frost |
| Layered fill | Woody layer, leaves, then 60:40 topsoil/compost mix | Drainage, nutrients, and long-lasting structure |
FAQ :
- How much stone do I need?For a 2.4 m x 1.2 m bed at 40 cm high, plan roughly 0.5–0.7 cubic metres of stone, depending on size and shape. Buy a little extra for caps and awkward gaps.
- Dry-stacked or mortared — which is better?Dry-stacked looks traditional and drains well. Lime mortar adds strength in exposed spots. Avoid cement-heavy mixes that trap water and flake softer stone.
- What soil mix works best?A loamy blend of about 60% topsoil and 40% mature compost, with a sprinkle of horticultural grit if drainage is slow. Refresh with 2–3 cm of compost each autumn.
- How high should I build?Most gardens thrive with 25–45 cm. Go taller if mobility demands it, but widen the base or add internal ties for stability above 60 cm.
- Can I use reclaimed stone?Yes. Reclaimed sandstone, limestone, granite, or setts work well. Avoid painted or contaminated rubble. Rinse off soil, and pair flatter faces to the top for capstones.


Loved the “March into April” line. The 60:40 topsoil/compost recipe and the layered fill made this click for me—thx! I’ll definately try a short French drain along the low edge.