Tiny holes and tired seams can make a beautiful room feel oddly unloved. A DIY expert shows a quiet, almost invisible way to fix wallpaper damage so your walls look brand new again, without ripping everything down or repainting the lot.
The Saturday light in a small London flat does strange things to a wall. You don’t notice dents and pinpricks all week, then the sun slides across the paper and suddenly every nail hole, every picture hook scar, glows like a constellation. A framed print comes down, and the emptiness it leaves looks bigger than the print ever did.
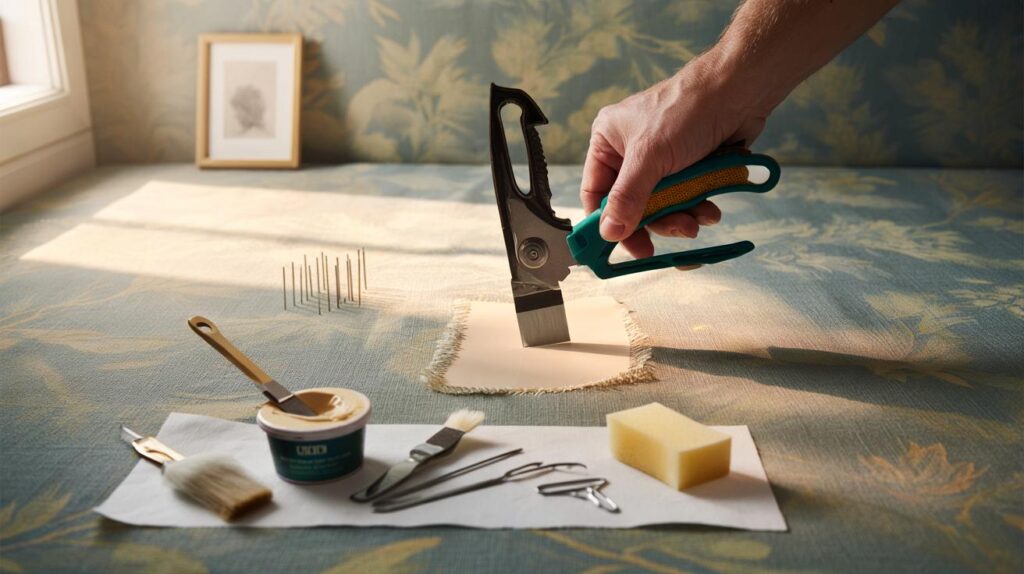
That’s where James, a soft‑spoken decorator with a tidy toolbox, runs a thumb slowly over the wallpaper and smiles. He doesn’t rush. He listens to the paper, in a way. I expected paste everywhere. He took out a blade instead, lined up a scrap of matching paper, and said something I didn’t quite understand.
Then he did something unexpected.
Why small holes make a big mess
Holes in wallpaper don’t just look like holes. They catch light, collect dust, and break the rhythm of a pattern that’s meant to flow. Even a single pinhole interrupts the repeat like a record with a scratch, so your eye keeps returning to the faultline. The wall begins to feel shabby, even if the paper is otherwise pristine.
Designers talk about “quiet surfaces”—walls that settle a room. When those surfaces get peppered with fixings and mishaps, the whole space gets noisier. Nothing catastrophic, just a feeling that won’t quite sit down. We’ve all had that moment when the party’s over, the pictures come down, and the wall looks older than it is.
Most people try paint or filler first. On bare plaster that’s fine. On wallpaper, filler dries flat, chalky, and the colour never matches the print or sheen. You end up with pale freckles where your art once hung. The pro trick is not to fill the hole and hope for the best. It’s to replace the damaged paper itself—precisely, invisibly—so the pattern and texture keep their story going.
The step-by-step fix: from pinholes to thumb-sized damage
The gold-standard method is a double-cut patch. Find a piece of spare wallpaper from your loft, a leftover roll, or even a hidden area behind a radiator box or inside a wardrobe. Align the repeat carefully over the damaged spot, then tape the patch lightly in place. Using a brand-new snap-off blade, cut a gentle, curving shape through both layers at once. Lift away the damaged piece from the wall, paste the exposed plaster with the right adhesive, and drop the patch in perfectly. Roll the seam lightly, wipe away any squeeze-out with a barely damp sponge, and breathe.
For tiny nail holes in painted lining paper or textured anaglypta, a different approach works. Tease loose fibres with the tip of your knife, press a whisper of fine surface filler into the hole, and let it set. Once dry, feather with a fine sanding pad and touch in paint to match the existing coat. On vinyl or washable wallpaper, skip the filler and use a micro dot of vinyl-over-vinyl adhesive to close lifted fibres, then dab with a warm spoon or seam roller. Let’s be honest: nobody does this every day. But when you do, it’s oddly satisfying.
Thumb-sized damage needs a bridge behind the hole so the patch won’t sink. Slide a butterfly of lining paper—paste on one side—through the opening, pull it flat with a hook made from a paperclip, and let it tack up. Once it grips, paste the area, place your pattern-matched patch, and make a soft, wavy cut if you need to fine-tune the edges. A wavy cut hides better than a straight one because no single line catches the light. It took less than five minutes, and the gap was gone.
https://youtu.be/msoKy5-M2X4
What the expert does that most of us miss
James works slow in the moments that matter. He doesn’t cut straight lines across obvious motifs. He follows the darker parts of a leaf vein, a ripple in faux linen, the shadow behind a paisley curl. He changes blades more often than you’d think, because a dull blade tears fibres and leaves raised edges that reflect light. He also “books” the patch—folds paste to paste for a minute—so it relaxes and won’t shrink after it’s on the wall.
The right adhesive matters. Paper-backed wallpaper loves traditional flake or ready-mixed paste. Washable or vinyl needs a vinyl-over-vinyl adhesive so the bond isn’t just strong, it’s right for the surface. Filler has a role only when the wallpaper is paintable or the hole is smaller than a match head in a non-patterned area. A good seam roller is helpful, but he uses fingertip pressure first. **Hard tools bruise soft paper. Slow hands don’t.**
There are the classic mistakes we all make, especially at the end of a long day. Too much paste that smears the print. Pressing so hard you polish the paper and leave a shiny thumbprint. Cutting in straight lines that scream under daylight. Or matching the repeat upside down—don’t laugh, it happens. **If in doubt, step back. Your eye sees misalignments from a metre away that your hands can’t feel at ten centimetres.**
“A patch that follows the pattern is invisible. A patch that fights it will always argue with the room,” James tells me, hands steady, blade fresh.
- Use a new blade for every patch. One dull cut can fluff fibres for good.
- Cut curves along dark lines in the pattern to hide edges.
- Paste the wall and the patch for a stronger, flatter bond.
- Wipe once with a clean, barely damp sponge. Then stop.
- Roll seams lightly; let the adhesive do the heavy lifting.
Making pattern and sheen disappear into themselves
Pattern matching sounds fiddly, and it is, but it’s also a rhythm. Hold the spare piece over the damage and rock it side to side until the lines sing together. Tape it gently. Cut your shape through both layers, lifting the patch every so often to check you’re not slicing through a light motif that will shout later. On grasscloth and other natural fibres, the trick is to borrow from the same roll and match the weave direction, because colour shifts between batches can be obvious in cool light.
Colour correction saves the day on those still-not-quite-invisible edges. A set of artist’s pencils or watercolours can nudge a white core towards the background tone. Test on a spare offcut and keep strokes dry and whisper-light. On textured or paintable paper, a thinned coat of the existing wall colour over a feathered filler repair will blend the sheen. **The goal isn’t perfection in your hand. It’s invisibility from the sofa.**
There’s also a trick for those ghost holes you only see at dusk. Dust the area with a dry decorating brush to remove fine plaster powder that catches light. If you’re fighting a stubborn dent in painted lining paper, warm the zone with a hairdryer and massage gently with the back of a spoon. The fibres relax, the crater lifts a fraction, and the surface reads smoother. Soyons honnêtes : personne ne fait vraiment ça tous les jours. But once you’ve seen a wall calm down, it’s hard to unsee.
What sticks with you once the wall goes quiet
There’s a feeling when a room gives a little sigh and sits back in its chair. You’ve put the frames away, the tools are rinsed, and the wall looks like itself again. The miracle isn’t the patch. It’s the way the pattern remembers what it was meant to do—flow, hush, hold the light evenly.
You don’t need an industrial kit or three weekends. You need patience in short bursts and a spare square of paper that knows the dance. Next time you move a shelf or add a socket, save a clean offcut and slide it into a drawer. Future you will thank past you when the sun finds another tiny scar. Maybe you’ll share the trick with a friend, or keep it as a quiet party piece. Either way, the room will tell you it worked.
| Key points | Details | Interest for reader |
|---|---|---|
| Double-cut patching | Match the repeat, cut through both layers, paste and drop in | Invisible repairs that survive close inspection |
| Right adhesive, right surface | Use wallpaper paste for paper; vinyl-over-vinyl for washable/vinyl | Repairs last longer and don’t lift at the edges |
| Blend edges and sheen | Curved cuts, light rolling, colour touch-ups, minimal moisture | Walls look brand new without repainting |
FAQ :
- Can I fix a hole without spare wallpaper?For tiny holes, yes: close fibres with vinyl adhesive or feather a fine filler on paintable paper. For patterned paper, you’ll get the best result with a pattern-matched patch. Borrow from behind a socket fascia or inside a cupboard if you must.
- What’s the best filler for small dents on paintable wallpaper?A fine surface filler or lightweight ready-mixed filler sands smoothly and won’t slump. Keep it thin, let it cure fully, then touch in paint to match the existing sheen.
- How do I hide a patch edge?Cut along a dark or busy part of the pattern in a gentle curve, paste both surfaces, and roll lightly. If the core shows white, tint it with a soft pencil or watercolour before the final wipe.
- How long should I wait before cleaning or painting a repair?Adhesive sets quickly but cures best overnight. Leave patches 12–24 hours before any extra cleaning. If you’ve used filler on paintable paper, wait until it’s fully dry before painting.
- Will a mesh wall patch work under wallpaper?Yes for larger holes, but bridge the void first with lining paper or a self-adhesive mesh to level the surface. Then add a pattern-matched wallpaper patch so the finish disappears into the room.


Brilliant walkthrough—my walls had those constellation nail holes exactly as you described. The double-cut patch tip and cutting along darker lines made the edges vanish. I also didn’t know to “book” the patch; game‑changer. Swapped blades (finally!) and stopped over‑rolling. Using vinyl‑over‑vinyl adheisve on my washable paper fixed a lifted seam I’d tried to fill before—no more chalky freckles. Defnitely saving offcuts behind the radiator for next time.