Radiators groan, laundry piles up, bills climb. Households want a winter fix that saves space, speeds drying and cuts costs.
As autumn bites and energy bills demand attention, a low-tech idea with a Victorian twist is stirring interest. The Range’s ceiling pulley airer promises quick indoor drying without monopolising floors or feeding a hungry tumble dryer.
What is the ceiling pulley airer
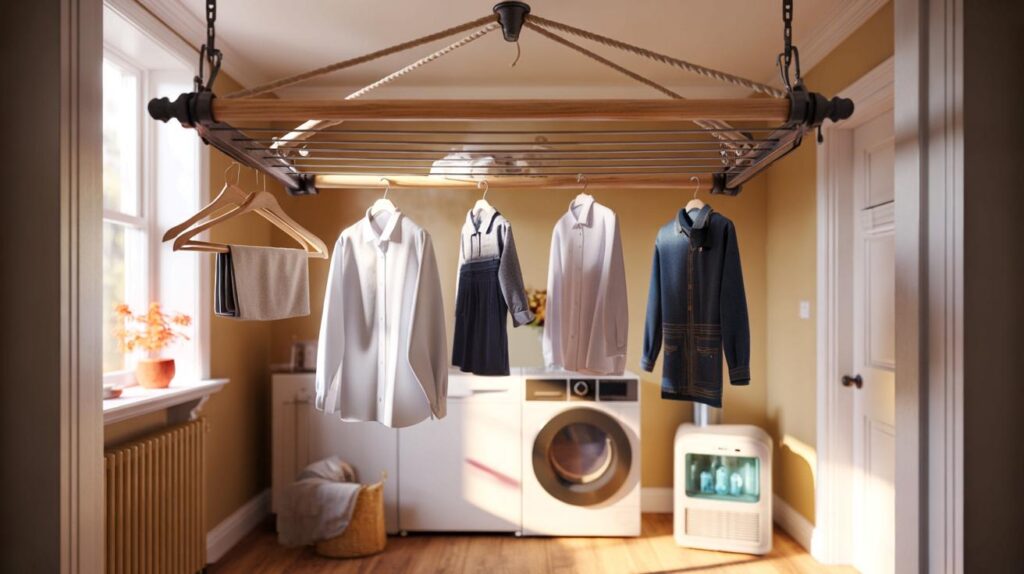
It’s a ceiling-mounted clothes rack you raise and lower on a rope and pulley. Six sturdy pine laths sit between powder-coated cast iron ends, giving broad rungs for towels, bedding and school uniforms. Once loaded, you hoist it up into the warmest air in the room. That buoyant layer near the ceiling does the hard work.
The brand’s pitch is simple: use the heat you already pay for. In lived-in homes, that means shirts, jeans and small towels can be ready in around three hours, while heavier items may take closer to four. All while the hallway and living room stay clear of trip-prone clothes horses.
Hoisted into the warmest air in your home, laundry can dry in roughly 2–4 hours without a tumble dryer.
How the warm air does the work
Warm air rises and holds more moisture than cool air. By lifting wet garments up, the airer taps that layer, improving evaporation and leaving precious floor space free for toys, pets and life. No fan. No heat bar. Just physics and a bit of rope.
Price, availability and key specs
- Price: £114.99 at The Range
- Construction: varnished pine laths with powder-coated cast iron ends
- Mounting: ceiling or wall brackets, works on level or sloped ceilings (with the right fixings)
- Drying time: typically 2–4 hours depending on fabric, load size and room temperature
- Included: illustrated instructions and fitting kit
- Footprint: zero once hoisted; ideal for compact homes
How much could you save
A typical vented or condenser tumble dryer uses roughly 2–4 kWh per cycle. On common unit rates, that’s around 50p–£1.10 a load. Families running several loads each week across the colder months can spend tens of pounds just on drying.
| Scenario | Loads per week | Weeks (Oct–Mar) | Typical dryer cost per load | Estimated spend | Potential saved with ceiling airer |
|---|---|---|---|---|---|
| Couple in a flat | 2 | 24 | £0.70 | £33.60 | Up to ~£34 |
| Family with young children | 5 | 24 | £0.80 | £96.00 | Up to ~£96 |
| Laundry-heavy household | 7 | 24 | £1.00 | £168.00 | Up to ~£168 |
Switching most winter loads from the dryer to a ceiling airer can trim £50–£150 off seasonal bills.
Who will benefit most
- Small homes where floor space is precious and airers block walkways.
- Families juggling school kit, sports gear and constant laundry cycles.
- Pet households trying to keep fur off drying racks at ground level.
- Anyone keen to dial down their carbon footprint without buying a power-hungry appliance.
Installation and practical checks
The kit arrives with illustrated instructions and suitable fixings for timber. The aim is to anchor into solid joists or structural timbers, never just plasterboard. A stud finder helps, though careful measuring and a pilot hole will also do the job.
Fitting steps at a glance
- Identify joists or solid fixing points and mark bracket positions.
- Drill pilot holes and secure the pulleys and brackets.
- Thread the rope, tie off correctly, then test with a light load.
- Check clearance above doors and lights when raised fully.
Sloped ceilings are workable. The pulley blocks let the laths hang level while the rope routes at an angle, provided the anchor points are sound. In tight hallways, measure for head clearance at the highest point and allow a safe margin above door swings.
Will it actually dry in three hours
In heated homes, yes for lighter loads. Several factors influence results:
- Room temperature: warmer rooms speed evaporation.
- Air movement: a small desk fan on low helps in still rooms.
- Load size: two thinner loads beat one overstuffed hoist.
- Fabric weight: denim and thick towels take the longest.
The pulley helps you stage drying: raise a first wave of shirts and smalls, then add towels later so warm air keeps circulating around each piece.
Moisture, mould and how to avoid them
Drying indoors releases water vapour. Without a plan, that can condense on cold windows and feed mould. A few simple habits keep the benefits without the damp:
- Crack a window or run trickle vents for 15–30 minutes while items start to steam.
- Run the bathroom extractor during the first hour if the airer sits nearby.
- Pair with a dehumidifier on a low setting; it speeds drying and captures moisture.
- Spin at 1200–1400 rpm to start with less water in the fabric.
How it compares with other options
- Heated airers: typically 200–300W. At 28p/kWh, that’s about 6–9p per hour. They add gentle heat but still take floor space.
- Dehumidifier drying: modern units use 150–300W and pull moisture from the room, useful alongside a ceiling airer in winter.
- Radiator drying: free in theory, but it throttles room heat and can lead to damp walls if overused.
- Tumble dryer: fastest on a wet day, but the priciest per cycle and harsh on fabrics over time.
Why people are warming to it
There’s a touch of nostalgia in black iron and pine, but the appeal is modern: fewer plastic frames in the lounge, less energy burned for each outfit, and faster turnarounds on school nights. Parents also like that hoisted laundry sits safely out of the way of toddlers and wagging tails.
Real-world capacity tips
- Alternate items edge-to-edge so warm air can pass between garments.
- Use hangers for shirts and blouses to maximise airflow along the laths.
- Group heavy pieces together for the uppermost rung so rising heat hits them first.
- Keep a microfibre cloth handy to wipe any stray drips before raising the rack.
What to consider before you buy
- Ceiling strength: older lath-and-plaster ceilings hide timber battens; target solid joists or seek a professional fitting.
- Ceiling height: the higher the better; 2.4 m rooms give comfortable headroom when hoisted.
- Lighting: check pendants and shades won’t clash with the rack when raised.
- Rope route: choose a cleat position that’s easy to reach and won’t snag.
Extra ideas that make it work harder
Add a small clip-on fan, set to low, at one end of the room. It encourages gentle circulation and shortens thick-towel drying times. In very cold snaps, time your central heating so the warmest hour coincides with the wettest load. If you own a dehumidifier, place it nearby on laundry mode and close the door to create a mini drying cabinet effect.
If you’re weighing the purchase against a winter budget, try a quick calculation: count your weekly loads, multiply by your expected dryer cost per cycle, and apply it to the colder months. If that figure nears or exceeds £115, the airer can pay for itself within a season, with years of use to follow. Even at lower usage, the gain in space, less fabric wear and fewer trip hazards make a strong case for households that can spare the ceiling space.


We ditched the dryer last winter and a pulley airer changed the game. Shirts in ~3 hours, towels maybe 4, as you say. Love the zero-floor-footprint—no more tripping over racks. Tip: spin at 1400 rpm and crack a window for 15 mins. Thanks for the detailed, no-gimmick explainer! 🙂👍
Genuine question: without a dehumidifier, won’t this just push moisture into cold corners and windows? I’m cautious after a bout of mould last year. Would a small fan on low be enough, or is a dehumidifier pretty much definately required?