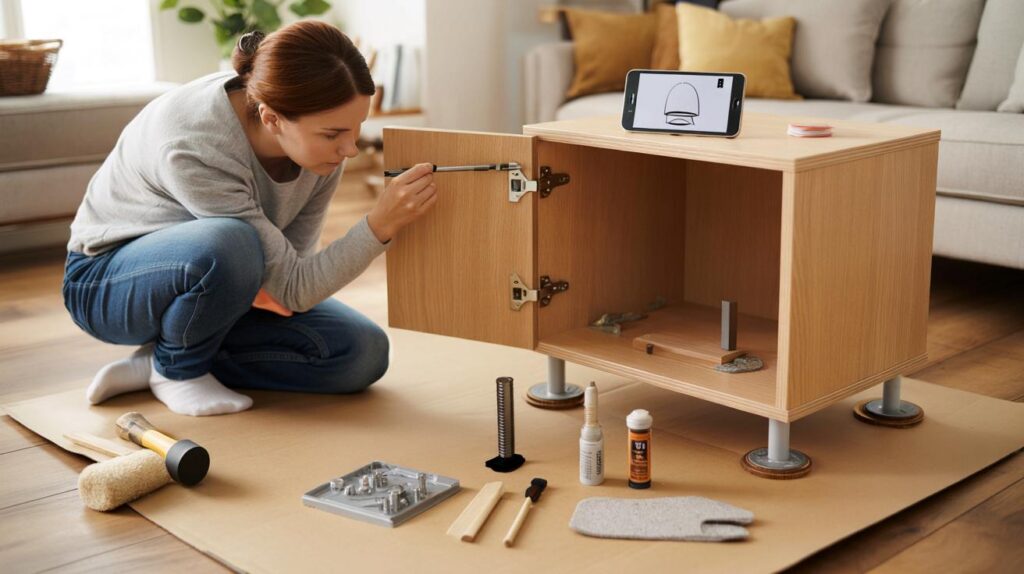
Autumn projects promise cosy rooms, until panels misalign and fixings fight back. The weekend clock ticks, nerves fray, and guests loom.
Across living rooms, kitchens and hallways, flat-pack ambitions stall on small errors that snowball. The cost-of-living squeeze nudges many to repair rather than replace. Quick fixes, cheap parts and calm checks can turn a wobbly carcass into a solid keeper, without tearing everything apart.
Read the signs before it collapses
Minor warning signs arrive first. A door rubs the frame. A drawer binds halfway. A top panel rocks on its feet. Each symptom points to alignment, not doom. Stop tightening. Look square-on from each side. Check gaps, hinge reveals and shelf spacing. Use a phone level to confirm the cabinet is truly upright and the floor is even. Many “wonky” builds slump because the floor is uneven, not the furniture.
If it rubs, binds or rocks, something is misaligned. Pause. Diagnose. Adjust one point at a time.
Quick checks that catch mistakes
- Confirm panel orientation by matching pre-drilled holes and edge finishes.
- Count fixings against the manual, then check each visible fastener is seated snug, not crushed.
- Verify cams face the correct direction before locking. A reversed cam will never bite properly.
- Inspect dowels: fully inserted, straight, and not bulging chipboard edges.
- Back off any screw that squeaks or spins. Re-seat rather than force it deeper.
Fast rescue moves that prevent a full strip-down
Many builds can be saved in minutes with targeted resets. Loosen the surrounding fasteners first so stressed panels relax. Nudge misaligned parts into place with a rubber mallet, but cushion blows with a folded cloth to protect edges. Once aligned, re-tighten in sequence, from the main frame to internal shelves, then doors and drawers. Work diagonally across fixings to avoid twisting the structure.
Tighten from the backbone outwards: side panels and stretchers first, then shelves, then doors and runners.
If a joint started crooked, remove that single dowel or screw, clean the hole, and try again with correct pressure. A thin spatula or a long-nose plier lifts a stubborn dowel without shredding the board. Keep screws straight. Angle drives chew chipboard and weaken the grip.
| Problem | Fix | Cost | Time | Tools |
|---|---|---|---|---|
| Door rubs frame | Re-level carcass, adjust hinges by 1–2 turns | £0 | 10 min | Phone level, screwdriver |
| Drawer jams | Reseat runners, check parallel and height | £0 | 15 min | Driver, tape measure |
| Wobbly frame | Square up, add corner brace inside | £2–£5 | 20 min | Brace, screws, drill |
| Spinning screw | Install threaded insert or dowel-and-glue plug | £3–£7 | 20 min | Insert kit or 8 mm dowel, glue |
| Panel edge chipped | Wax filler, colour pen, edge tape | £4–£8 | 15 min | Wax stick, pen, iron for tape |
When damage is done: make weak joints stronger
Chipboard and MDF punish over-tightening. Threads strip. Holes ovalise. Joints creak. Rather than throw the unit away, reinforce the problem area and spread the loads.
Repairing stripped chipboard
For a wood-screw hole that no longer grips, two robust routes exist. The quickest is a dowel plug: drill the hole clean to a neat cylinder, glue in an 8 mm hardwood dowel flush, let it cure, then pilot-drill and re-screw. The stronger route is a threaded insert designed for particleboard. Pre-drill, thread the insert into the board, and use a machine screw. The insert’s larger surface area grips soft fibres far better than a wood screw.
For spinning cam fittings, fit a cam repair sleeve or a slightly larger cam dowel from a hardware pack. If the panel around the hole has puffed, wick thin wood glue into the fibres and clamp with scrap blocks until set, then try again with a fresh cam dowel.
Stiffening a rickety carcass
Flat backs often do the real squaring. If the back panel was tacked loosely, remove a few nails, pull the cabinet square using a diagonal measurement check, then re-fix with more pins or screws. Add corner braces inside the top rear corners for long units. A full-width stretcher under a heavy top spreads loads and curbs rattle.
Small steel angles under £2 can turn a wobble-prone frame into a firm, silent box.
Hiding cosmetic scars
Use wax filler for chips, then blend with a furniture touch-up pen in the nearest shade. On raw edges, apply pre-glued edge banding and set it with a household iron on low heat through baking paper. Lightly sand the edge banding with 320-grit to match the sheen. Avoid silicone polishes near repairs because they resist fresh finishes.
Build to prevent repeat mishaps
Set up a clear workspace and protect floors with cardboard. Sort fixings into bowls. Check every panel number and hardware count. Dry-fit tricky joints before glue or cams lock. If your drill has clutch settings, pick a low torque to stop screws burying themselves into soft fibreboard. A square, a level and a tape measure beat guesswork every time.
Your weekend kit that pays for itself
- Two screwdrivers: No.2 Pozidriv and flat blade
- Allen keys or hex bits for common cam bolts
- Rubber mallet and a soft cloth
- PVA wood glue and a two-part wood filler
- 8 mm hardwood dowels and assorted threaded inserts
- Corner braces, 12–16 mm screws, and cup washers
- Phone level, combination square and a tape measure
- Fine sandpaper, wax sticks and a touch-up pen set
When to stop and seek parts
Walk away if a panel has cracked across a cam hole, if pre-drilled holes sit visibly off-line, or if a metal runner is bent. Many retailers supply replacement fixings and even panels through customer service desks. Keep your order number, take photos of the fault, and request the specific hardware code from the manual. That route avoids bodges that void returns.
Key ideas worth knowing
A cam-and-dowel joint clamps two panels by expanding a barrel against a metal post. It needs straight holes and light torque. Over-rotating a cam chews the seat and loosens grip. A threaded insert plus machine screw applies repeatable force and survives reassembly. A dowel plug restores fibre density in a stripped hole at low cost. Pilot holes set at 85–90% of screw root diameter reduce splitting in MDF and give stronger hold.
Work slow, clamp often, and let glue cure fully. Rushing adds hours later.
Two practical extras for real homes
Uneven floors create fake “wobbles”. Test by shimming one foot with coins until the cabinet sits dead still, then fit felt pads of matching thickness. That hack costs pennies and ends rocking without surgery. Heavier loads need spreaders: place a thin plywood pad under each foot to stop sinks into carpet or soft floors, which throw doors out of line.
Time and money check: a brace pack, inserts, wax and dowels total under £20 for most households. That stash can rescue multiple units over years. Ten minutes spent squaring the frame, plus 20 minutes setting inserts and braces, often beats a two-hour strip-down and keeps a good-looking piece in service. Keep the manual, bag spare fixings, and mark panels discreetly with painter’s tape for the next move or room shuffle.


Coin shim hack just saved my Sunday. Thanks!
Genuinely helpful—re-leveling the carcass before touching hinges fixed my door rub in 10 mins. Definitley didn’t need a full strip-down after all.