As garden diseases bite and budgets shrink, a forgotten family trick resurfaces, promising sturdier beds with little fuss this winter.
Gardeners across Europe are trialling a low-tech composting protocol that turns kitchen peelings and lawn clippings into a protective soil amendment in just four weeks. The method borrows from Southeast Asian farm practice, adds a modern understanding of the Trichoderma fungus, and leans on habits many grandparents swore by.
The story behind the protective compost method
Decades ago, smallholders in Southeast Asia noticed that certain compost heaps did more than feed the soil. Crops near those piles resisted common soil-borne diseases. The difference came from beneficial fungi that colonised the heap and outcompeted pathogens. One genus, Trichoderma, proved particularly useful. It grows fast, consumes rival fungi, and primes plant roots to defend themselves.
Family gardeners in Europe adapted those observations long before the science caught up. They layered straw, fresh manure and a sweetener, kept the heap breathing, and let time do the rest. Today, the same recipe has a scientific gloss: inoculate with Trichoderma spores and manage moisture and airflow so the right microbes thrive.
Four weeks, not four months. Keep it warm at 35–40°C, moist not soggy, and let the heap breathe every three days.
What you need
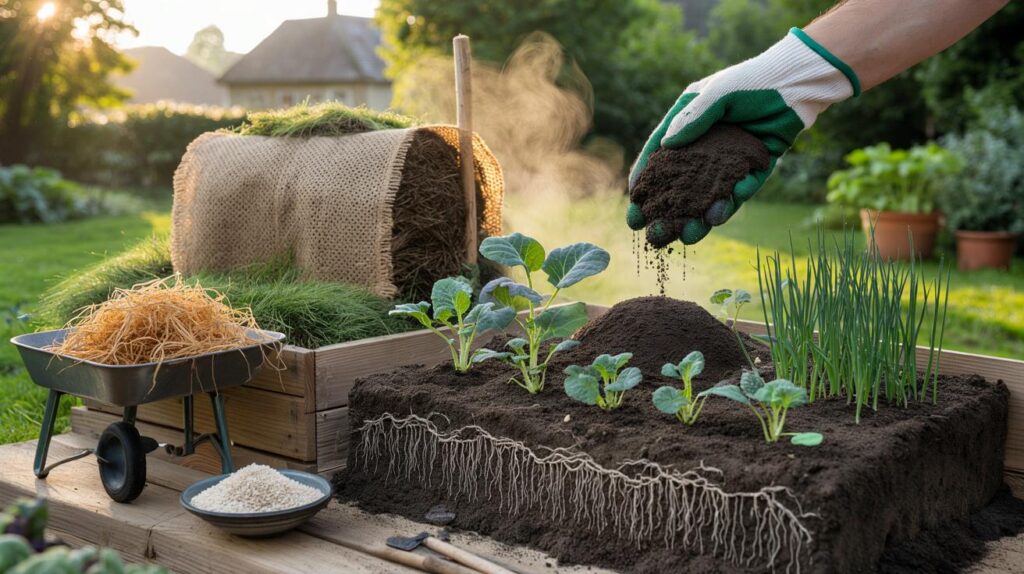
For a 1 m³ heap designed to act as a plant shield, the mix is simple and specific.
| Item | Amount for 1 m³ | Role |
|---|---|---|
| Straw or dry hay | About 200 litres (4 parts) | Carbon source; structure and airflow |
| Fresh manure | About 150 litres (3 parts) | Nitrogen source; heat and microbial fuel |
| Trichoderma spores | 500 g | Beneficial fungus inoculant |
| Molasses or runny honey | 2 tablespoons, diluted | Quick sugar feed for microbes |
| Rainwater | As needed | Moistening without chlorine |
On a tight budget, prime 1 kg of uncooked rice with a small pinch of Trichoderma, keep it in a perforated bag for seven days, and use the rice as your inoculant. The goal is to seed the heap with the right biology, not to rely on expensive inputs.
Step-by-step method
Prepare the straw
Soak the straw or hay for 24 hours. Squeeze a handful. Two or three drops should fall. If it streams, it is too wet. If it feels dry, add more water and rest it for another hour.
Enrich the manure
In a barrow, blend the fresh manure with molasses dissolved in 2 litres of warm water. The mix should smell earthy rather than sharp. This liquid wakes the microbes and helps Trichoderma establish quickly.
Inoculate with fungus
Sprinkle the Trichoderma evenly over the manure mix. Fold it through with a fork. Aim for gentle mixing. You want an even spread, not a compacted paste.
Build the heap
Layer 20 cm of moist straw, then 15 cm of the inoculated manure. Repeat until the stack reaches around 1 metre high. The alternating layers create a warm, airy core where beneficial fungi race ahead of pathogens.
Cover and breathe
Cover the heap with a perforated sheet or an old cotton cloth. This keeps moisture in but lets gases out. Every three days, poke several air channels down through the heap with a sturdy stick.
Expert checks and tweaks
Use your hand as a thermometer. Slide it into the core. It should feel gently hot, around 35–40°C. If it burns, cool the heap with a little extra dry straw. If it feels cold, feed it with a small amount of fresh manure and re-cover.
Trust your nose. A healthy heap smells like a woodland floor after rain. Ammonia suggests too much nitrogen or compaction. Sour odours point to waterlogging. Adjust the layers and airflow accordingly.
If it smells like a forest and feels warm to the palm, the biology is working for you, not against you.
Turn the heap after two weeks. Fold the outer material into the centre, then rebuild the layers lightly. Repeat weekly until maturity. Each turn refreshes oxygen and prevents dead zones where unwanted microbes might take hold.
From week four: how to use it
By the fourth week, the compost looks like dark, friable crumbs. It breaks apart in the hand and no longer shows recognisable straw. Work it into beds at about 20% of the soil volume. For high-value seedlings, use it straight, as a seed-starting medium with excellent disease suppression.
Make a compost tea for stressed plants. Steep a generous handful in 10 litres of water for 48 hours, stirring once daily to aerate. Water the root zone of affected plants. The brew carries living organisms that can outcompete harmful fungi on contact.
- Wet springs: reduces damping-off losses in seed trays and propagation benches.
- Heavy soils: improves structure and drainage while adding protective biology.
- Greenhouses: buffers against recurring fungal problems under cover.
- Container veg: maintains resilience where potting mixes get tired mid-season.
What results to expect
Trichoderma does three jobs at once. It colonises near roots, occupies space that pathogens would take, and releases enzymes that break down problem fungi. Plants respond by thickening root systems and pushing new growth more confidently. Gardeners report sturdier stems and fewer early-season losses, especially in courgettes, beans and brassicas.
One cubic metre of this compost goes a long way. At a 20% mix, it amends roughly 5 m³ of soil. That covers a 25 m² bed to a depth of 20 cm. For smaller plots, store the finished material in breathable sacks in a cool, shaded spot.
Safety, costs and practical tips
Handle fresh manure with gloves. Keep dog and cat waste out of any compost that will touch food crops. Wash leaves and roots before eating. If you only have tap water, leave a bucket out for 24 hours so chlorine dissipates, or use water from a water butt.
Adjust the schedule to the season. In a heatwave, shade the heap and check moisture daily. In a cold snap, the process may take five to six weeks. The signs of readiness never change: dark colour, crumbly texture, and that woodland scent.
If you cannot source spores, the rice inoculant works. Some gardeners also save a scoop of last year’s successful heap and use it as a starter. The aim is continuity of the helpful biology that suits your local soil and climate.
Ready to use: dark crumbs, no ammonia, and a clean earthy aroma. Not ready: recognisable straw and sour notes.
Common mistakes and easy fixes
- Heap too wet: add dry straw layers, increase air holes, and prop the cover for a day.
- Heap too dry: sprinkle with rainwater, re-cover, and check again after 12 hours.
- Strong ammonia smell: dilute with carbon by adding more straw or shredded stems.
- No heat at all: fold in a small fresh manure layer and feed a spoon of molasses in warm water.
Why this matters now
Weather swings are amplifying garden disease pressure. Chemical fixes are costly and narrow in effect. A biologically active compost gives broad protection, feeds soil life, and recycles clippings and peelings that might otherwise rot in a bin. It reduces reliance on synthetic fungicides and keeps carbon in your beds rather than in the atmosphere.
For curiosity’s sake, try a simple test. Sow two trays of the same seeds. Use your usual mix in both, but add 20% of this compost to one. Track germination, damping-off losses, and early vigour. The comparison shows what numbers and recipes cannot: how a living amendment behaves with your water, your light, and your microclimate.


This is brilliant! I’ve been losing seedlings to damping‑off; the Trichoderma angle makes sence. No molasses here—would a thin brown‑sugar syrup be ok as the quick microbe feed? 🙂