Winged eyeliner is a tiny decision that can derail a whole morning. One wobbly flick, a smudge you can’t ignore, and suddenly you’re redoing base, mascara, mood. Makeup artists have a low-tech way out of the spiral: a simple teaspoon.
The bus heater fogged the window and my phone camera kept lying about the light. I was parked in a café loo with five spare minutes and a flick that looked like it belonged to another person entirely. We’ve all had that moment when one eye is channeling vintage screen siren and the other is auditioning for a different film. Later that week, I watched a London makeup artist lace a spoon along a model’s lash line like it was a ruler in school. The room went quiet the way rooms do when something obvious and brilliant happens. The liquid liner followed the spoon. The wing fell into place. It looked almost lazy. It looked perfect. It looked repeatable. It worked.
Why a spoon could change your liner game
Every face tells a slightly different story, which is why symmetry can feel like myth. Lids fold, lashes curl, one brow lifts higher when you talk about money. A spoon cuts through the chaos by offering a clean edge and a predictable curve, something constant against all the tiny moving parts. It’s not glamorous, and that’s the beauty of it. Your hand steadies the moment metal meets skin, and the line behaves.
Think of the last time you tried to freehand a wing on a Monday when the kettle was boiling and the emails were already dinging. You probably had the classic loop: draw, overcorrect, thicken, repeat. The spoon interrupts that loop. I watched a bridesmaid in a crowded hotel room use the handle to map her angle while laughing at a joke, and her wing still landed true. Not because she was a genius, but because the tool made the choice for her. Less guessing, more doing.
There’s also physics in play. The spoon’s bowl mirrors the natural curve of your upper lash line, which means your liner hugs a shape your eye already owns. The handle offers a straight edge for the flick, so you control lift without chasing it. Metal gives structure, and structure frees you to keep the pressure and angle consistent. When the path is set, your hand relaxes and your line follows.
The spoon technique, step by step
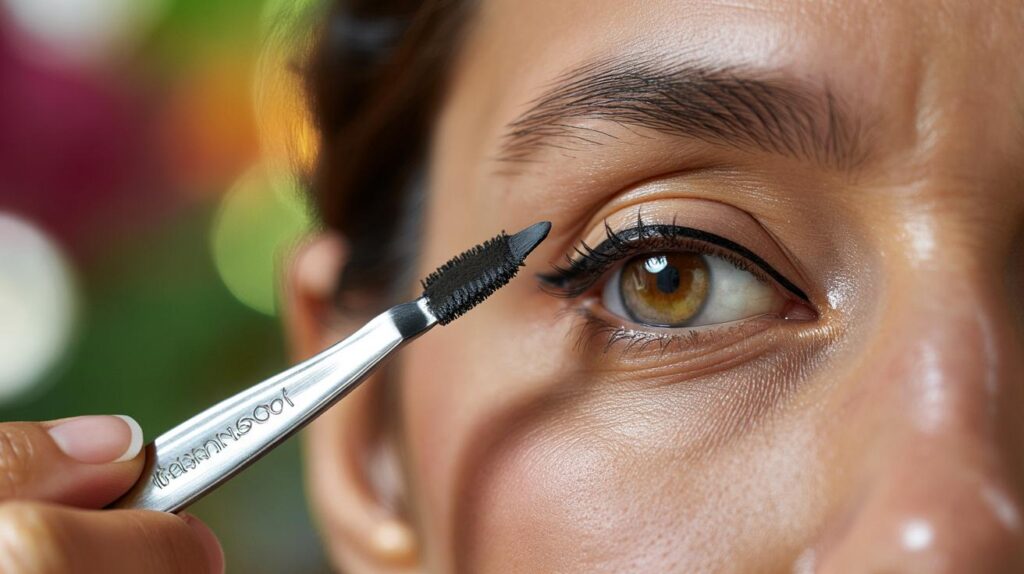
Start with clean, dry lids and a liner you know. Pen tips are forgiving; gels with a fine brush deliver drama; felt tips split the difference. Hold a clean teaspoon with the handle angled from the outer corner of your eye toward the tail of your brow. That handle is your wing blueprint. Draw a thin line along the handle’s edge, flicking outward as far as you like. Next, flip the spoon so the bowl hugs your lash line, then connect the wing to the centre of your lid with small, sure strokes. Fill in the triangle, blink, breathe.
Small choices matter here. Keep the first pass light and sketchy, as if you’re tracing a pencil line you plan to ink. If you press the spoon too hard, you’ll dent your concealer and fight texture. If your lid is hooded, tip the handle slightly more horizontal so your wing remains visible when your eyes are open. Let’s be honest: nobody actually does that every day. But when you do, you’ll want this move in your pocket.
Your angle is your identity, so test it. Try lower for length, higher for lift, and somewhere in between when you want both. **This trick isn’t cheating; it’s smart.** The spoon makes the maths of your face easier to read and harder to argue with. You’re not trying to be someone else’s tutorial; you’re coaxing out your own shape with a tool that behaves the same way, every time.
“The spoon gives you a fixed reference point on a moving canvas,” a backstage artist told me, tapping the handle like a conductor’s baton. “Once you see your angle, you stop chasing it.”
- Wipe the spoon between eyes to avoid transferring product.
- Rest your elbow on a table for instant stability.
- Map the wing with brown first if black feels scary.
- Use the spoon’s tip to press a tiny guide dot where you want the wing to end.
- Finish with a cotton bud dipped in micellar water for crisp edges.
Fixes, tweaks, and making it yours
Think of the spoon as training wheels you can keep or ditch as the mood takes you. If your liner skips over skin, a whisper of primer calms the road. If your flick looks blunt, turn the handle so you’re working off its edge, not its face. **Your spoon becomes a stencil and a steady hand in one.** When humidity hits, lock the shape with a thin pass of waterproof topper. And if you mess it up, breathe out and use the bowl’s curve as an eraser guide with a pointed cotton bud. Clean line, clean slate.
What goes wrong most often? Stretching the skin, which warps the result the moment you let go. Sitting too close to the mirror, which steals your view of both eyes at once. Rushing the fill, which turns a sleek wing into a block. You’re not failing; you’re just doing too much. Pull back, look straight ahead, check the angle, then return for the detail. **Practice on a makeup-free night, not before a big event.** That’s when learning feels like play.
There’s a quiet kindness baked into this trick. A spoon is universal, unscary, already in your drawer, so you don’t have to buy your way into competence. It reminds you that craft beats hype, and that repeatable beats viral when you’re getting ready for work. When people ask if you’ve done something different, the answer can simply be that you made your routine easier. That kind of change reads on the face.
Some days are full-lash, siren-wing days. Others are school-run, 90-second days where mascara is doing the heavy lifting and your “wing” is barely a whisper at the corner. The spoon adapts to all of them. It gives you permission to turn the volume up or down without reinventing your hand each time. You might find you favour a softer brown for daylight and a pitch-black gel for night. You might pair a baby flick with balm on the lids and call it a look. The point isn’t perfection, it’s peace. Share the trick with a friend who’s given up on liner. Watch their face light up when the handle hits the skin and the flick appears like it always belonged there.
| Point clé | Détail | Intérêt pour le lecteur |
|---|---|---|
| Angle with the handle | Align from outer corner toward brow tail to set the wing’s lift. | Removes guesswork and keeps both sides consistent. |
| Curve with the bowl | Hug the upper lash line to draw a smooth, natural base. | Matches your eye’s shape for a cleaner, quicker line. |
| Light first pass | Sketch thinly, then build and tidy with a cotton bud. | Prevents over-thickening and makes corrections painless. |
FAQ :
- What kind of spoon works best?A regular teaspoon is ideal. Its handle is slim for the wing, and the bowl’s curve fits most lids without feeling bulky.
- Pen, gel, or liquid?Use what you already handle well. Pens are the easiest to control along the handle; gels deliver bolder payoff with a fine brush.
- How do I match both sides?Place tiny guide dots where you want each wing to end, using the handle to mark the angle. Connect the dots to keep symmetry honest.
- Can this work on hooded eyes?Yes. Keep the wing slightly more horizontal and draw with your eyes open, looking straight ahead to ensure the tip remains visible.
- What if my liner transfers?Blot lids, add a thin layer of primer, and switch to a quick-drying formula. A light dust of translucent powder over the crease helps.


Tried the teaspoon hack this morning and it actually worked 🙂 Using the handle to set the angle kept both sides even, and flipping to the bowl made the line smooth. I’ve got mildly hooded lids and tipping the handle more horizontal kept the tip visible. Wiping between eyes helped too—thanks!