Your drawer handle shouldn’t feel like a wobbly handshake. When it does, it’s not just annoying — it’s wear in progress. Tiny movements open the door to bigger failures: chipped fronts, stripped holes, stretched screws. The fix costs pennies and minutes, yet most of us live with the rattle until something snaps. There’s a better way, one that makes furniture feel solid again and last years longer. It starts with understanding why a simple pull loosens and what to do the very first time it does. The trick is knowing where the real problem lives, not just spinning a screw tighter. That’s where things change.
Sunlight from the window fell across the kitchen drawers, and I could hear it before I felt it — that faint click-clack of a loose pull. The handle turned under my fingers like a coin on a tabletop. Two more breakfasts like this and the screw would chew the wood to dust. I fetched the jam jar that everyone has, the one full of orphaned screws and Allen keys, and sat on the floor like a mechanic with a teaspoon. This isn’t glamour. It’s the quiet maintenance that keeps a home feeling steady. The cure begins with a small, boring decision.
Why your handles work loose (and what that really means)
Every time you tug a drawer, you’re applying a lever to a tiny thread inside wood, chipboard, or MDF. Micro-movements turn into macro problems: threads polish smooth, face veneers bruise, and screws creep back a millimetre at a time. Humidity swells the panel in winter, then shrinks it in summer, and that seasonal breathing loosens everything. What looks like laziness is physics, disguised as a rattle.
I once watched a cabinet maker tighten twelve identical kitchen pulls in a rented flat. Five were loose, two were barely hanging on, and one had been “fixed” with tape wrapped around the screw. He didn’t scold, he just smiled and reached for blue thread locker and a bag of tiny washers. Ten minutes later, the kitchen sounded different. No clack, no squeak. Just the clean “thunk” of a drawer that knows where it lives.
The real culprit is often mismatched hardware and substrate. A screw that’s 2 mm too short barely bites; one too long bottoms out and gives a fake feeling of tightness. Particleboard crumbles under repeated twisting, while solid oak holds a thread like a vice. Machine screws with insert nuts behave differently to wood screws in raw timber. Get the pairing wrong and the handle becomes a hinge for trouble. Get it right and the stress distributes across a wider, calmer area.
Quick fixes that actually hold
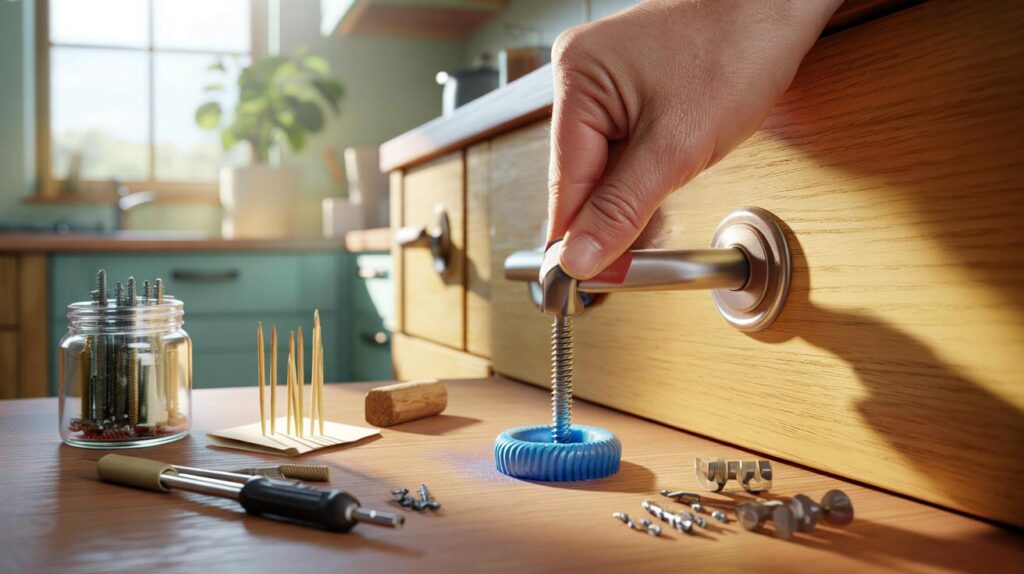
Start by removing the handle and inspecting the hole. If the wood thread is intact, clean dust from the screw and add a dot of medium-strength thread locker (the blue one), then refit snugly. If the hole is a little loose, the classic fix works: dip two wooden toothpicks in PVA wood glue, press them into the hole, trim flush, and drive the screw back in. You’ve created fresh fibre for the threads to bite. Add a thin washer under the screw head to spread the load, especially on painted fronts.
If you’ve got a through-bolt (common on flat-pack with M4 machine screws), swap a chewed screw for a fresh M4 of the correct length and consider a low-profile spring washer behind the nut. On chipboard that’s failing, upgrade to a “backplate” or handle with a wider footprint to reduce stress. Keep holes aligned — don’t twist the handle to “make it fit” — or you’ll build in constant strain. Tight, square, done. Small, precise moves beat brute force every time.
Common mistakes are easy to forgive. Overtightening strips threads or crushes lacquer, and grabbing any old screw from the jam jar often mixes imperial and metric threads. Let’s be honest: nobody actually does that every day. Wipe away sanding dust before glue, give PVA a little time to set before heavy use, and avoid superglue near finished faces. If the hole is truly gone, plug it: drill 6–8 mm, glue in a hardwood dowel, trim, redrill a pilot, then refit. It sounds faffy. It’s the most durable fix you’ll do all year.
There’s a quiet pride to making a tired drawer feel crisp again. Good hardware is maintenance, not decoration. When in doubt, follow the carpenter’s rhythm: slow in, line up, gentle pressure, stop when the resistance lifts. If a handle keeps returning to “loose”, the substrate needs an upgrade — think threaded inserts for MDF, or a full dowel plug for chipboard. Make small corrections early and you won’t need big rescues later.
“Most loose handles aren’t a crisis of strength; they’re a crisis of attention. One minute now stops ten minutes later,” says Ben, a joiner from Leeds who carries thread locker the way chefs carry salt.
- Mini kit to keep in a drawer: M4 machine screws in common lengths, PVA wood glue, medium thread locker, toothpicks, 6–8 mm hardwood dowels, a spring washer assortment, 2 mm and 4 mm drill bits, a hand screwdriver that actually fits your screws.
- Quick checks: correct screw length, clean threads, straight handle alignment, intact substrate, gentle snugging rather than cranking.
- Upgrades that help: backplates on crumbly boards, threaded inserts for MDF, quality handles with solid backing rather than hollow posts.
Make it last with small habits and smarter choices
We’ve all had that moment where a knob spins like a loose tooth and you decide to “sort it later.” Later is what breaks furniture. A five-minute fit-and-forget routine pays back for years: retighten once, add thread locker, replace bad screws, and upgrade the contact area if the board is weak. Choose handles that suit the material, not just your mood board. Long, heavy bar pulls on thin chipboard fronts need help — a backplate or wider posts spreads the force so the face doesn’t bruise. Consider swapping to through-bolted handles if wood screws keep failing; an M4 bolt, a proper washer, and a tidy nut inside the drawer turn a fragile joint into something almost industrial. Soyons honnêtes : personne ne fait vraiment ça tous les jours — which is why planning a small “hardware day” twice a year keeps the house quiet and the drawers faithful. The silence of a solid drawer is its own kind of luxury.
| Key points | Details | Interest for reader |
|---|---|---|
| Stop the wobble early | Clean threads, add blue thread locker, snug by hand, not with a drill | Fast, cheap fix that prevents bigger damage |
| Rescue stripped holes | Toothpick-and-PVA trick for mild wear; dowel plug and redrill for severe | Restores bite and extends the life of tired furniture |
| Match hardware to material | Use backplates on chipboard, threaded inserts in MDF, correct M4 lengths | Fewer re-tightens, sturdier feel, better longevity |
FAQ :
- How do I stop a handle loosening again and again?Add medium-strength thread locker to clean screw threads, use a washer to spread load, and snug by hand. If it still drifts, upgrade the substrate with a dowel plug or a threaded insert.
- Can I fix a stripped hole in chipboard or MDF?Yes. For light wear, the toothpick-and-PVA method works. For crumbled holes, drill clean, glue in a hardwood dowel, trim flush, drill a fresh pilot, then refit — or use a threaded insert for MDF.
- What glue should I use — wood glue, epoxy, or superglue?Use PVA wood glue for fibre reinforcement (toothpicks, dowels). Use epoxy when you need gap-filling strength. Superglue is brittle and can whiten finishes, so reserve it for emergency stabilising, not structural fixes.
- My screw just spins and won’t tighten. What now?That means the threads have no bite. Remove the handle, repair the hole (toothpicks or dowel), or switch to a through-bolt with a washer and nut if the design allows.
- Is upgrading hardware worth it?Often, yes. Handles with wider posts or backplates reduce stress, and M4 machine screws with inserts make repeated tightening a non-event. The cost is small; the feel is huge.


I tried the toothpick + PVA trick and a dab of blue thread locker on my IKEA drawers—night and day. The “thunk” test passes now. The washer under the screw head was the missing piece for painted fronts. Bookmarked for the next hardware day, cheers!
Do toothpicks realy last, or do they just buy time?