You’re staring at glossy tiles from the late 2000s, dreading the dust and chaos of chipping them off. The question bites: could you just lay fresh tiles on top and call it a day? Sometimes that move is a time-saver. Other times it’s a trap you won’t see coming until it’s too late.
It starts with a quiet Sunday, kettle on, slippers whispering across a tiled kitchen that’s fine from a distance and awful up close. You squat, run a fingernail along a chipped edge, then rap the floor with a knuckle—tap, tap, a dull thud in one corner and a sharp clink in another. You picture the mess of demolition, the bags of rubble, the skip in the rain. You also measure in your head: will the fridge still slide back in, will the door clear, will the thresholds trip you at night? Your phone lights with a YouTube promise that tile-over-tile is “easy”. The kettle clicks off. Then the floor answers back.
When tiling over tiles works a treat
Over-tiling is at its best on solid, echo-free surfaces where the existing tiles are firm, flat, and clean. It can transform a kitchen or hallway in days, without the cloud of dust or the noise that makes neighbours glare. **Tile-over-tile shines when the base is rigid, dry and true.**
In a Manchester rental I visited, a landlord needed a fast turnaround between tenants. The old ceramic was dull but rock solid on a concrete slab. He scrubbed the glaze, used a bonding primer, then a flexible C2 S1 adhesive, and set new 10 mm porcelain. Total build-up, including adhesive, was 14 mm; doors were undercut, thresholds re-trimmed, and the room looked brand new by Friday. He saved two days, one skip, and a chunk of his deposit on the flat’s hallway life.
The method works because you piggyback on a stable layer that’s already been levelled. If the existing field is within roughly 3 mm over 2 m and bonded like a drum, you’re halfway there. British Standard BS 5385 accepts over-tiling where the substrate is sound and movement joints are respected. Yet if there’s movement, moisture or unknowns behind the glaze, you’re gambling with every trowel stroke.
How to do it right when you can
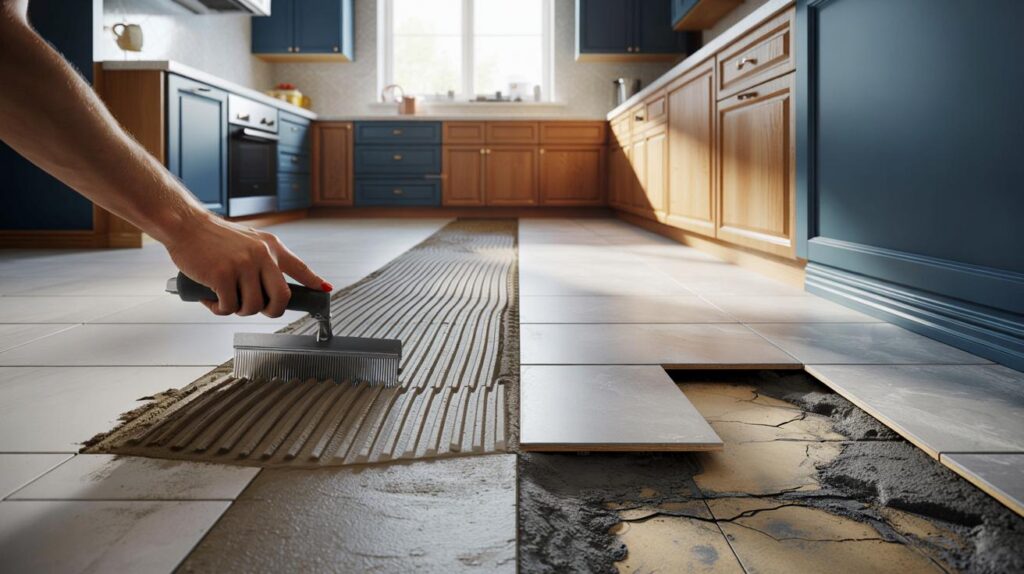
Clean like you mean it. Degrease with sugar soap or an alkaline cleaner, rinse, and let it dry fully. Lightly grind or sand the glaze to give it “tooth”, vacuum the dust, then roll on a tile-to-tile primer such as Mapei Eco Prim Grip, BAL Bond SBR, or Ardex P4. Mix a flexible, polymer-modified thin-set (C2 S1), comb in one direction with the right trowel, and back-butter larger porcelain so you hit 95% coverage on floors. Keep the bed 3–5 mm, set your lines, and honour every movement joint.
The biggest mistakes are invisible until they’re expensive. Skipping the tap test and tiling over hollow areas turns your new floor into a drum kit. Forgetting door and appliance clearances gives you a perfect floor that won’t let the oven back in. Grouting too soon can trap moisture in cool rooms. We’ve all had that moment when the “quick job” starts arguing back. Let’s be honest: nobody really does that every day.
On walls, weigh the build-up: plasterboard has a practical tile weight limit around 32 kg/m² including adhesive and grout, and tile-over-tile can nudge past it.
“Tile is only as good as what it’s stuck to,” says Rob, a tiler who’s been tapping floors for 20 years. “If the base moves, your grout will tell on you within a week.”
*Do the boring prep and the glamour tiles take care of themselves.*
- Do a tap test and lift any hollow, drummy tiles.
- Patch and flatten joints with a levelling skim where needed.
- Prime with a grip primer made for glazed surfaces.
- Plan heights at doors, plinths, and appliances before mixing adhesive.
- In wet areas, investigate for leaks; if there’s any doubt, strip back.
When you absolutely shouldn’t do it
You can’t polish a problem and call it a solution. A cracked, moving floor, a shower wall with soft grout lines and a musty smell, or any sign of water ingress is a hard stop. Over-tiling adds weight and height; on timber floors with bounce, on plaster skim, or on plasterboard already at its load limit, it’s asking for failure. **Height kills more projects than adhesion does.** Think: door bottoms, dishwasher clearance, toilet flange height, shower tray edges, and stairs nosings becoming toe-stubbers. In wet rooms, an extra layer changes falls to the drain and can push water where it never went before. If you don’t know what’s behind those old tiles, you might be sealing a gut problem behind a pretty face. The brave move isn’t always tiling over—it’s lifting the first tile and listening to what’s underneath.
| Key points | Details | Interest for reader |
|---|---|---|
| When over-tiling works | Solid, flat, dry tiles on rigid substrates; bonding primer and flexible C2 S1 adhesive | Fast makeover without demolition dust and skip hire |
| Red flags | Hollow sounds, damp, movement, height conflicts, overloaded walls | Avoids spending twice by spotting deal-breakers early |
| How to do it | Degrease, key the glaze, prime, back-butter, honour movement joints | Step-by-step that improves adhesion and long-term finish |
FAQ :
- Can I tile over tiles in a bathroom?Yes, if the existing tiles are rock solid, dry, and free of leaks. Any sign of damp, blown grout, or soft plaster behind means strip back, repair, waterproof, then retile.
- What adhesive sticks to glazed tiles?A polymer-modified thin-set rated C2 S1, paired with a tile-to-tile grip primer. Brands like Mapei, BAL, and Ardex have systems designed for low-porosity surfaces.
- How do I test if my old tiles are sound?Do a tap test with a coin or knuckle; hollow or drummy notes mark tiles to lift. Check for cracks that run across several tiles—often a sign of movement below.
- Will the extra height cause issues?Count on 11–17 mm for tile plus adhesive. Check door clearances, appliance plinths, thresholds, toilets, and shower drains before you start mixing.
- Do I need to roughen the existing glaze?Yes, a light grind or sand improves the mechanical key. Combine that with a compatible primer to boost bond strength and peace of mind.


Super helpful explainer. The bit about height killing more projects than adhesion—spot on. I’ve seen doors jam after a ‘quick’ over-tile. Do you have a rule of thumb for minimum fridge plinth clearance after adding ~14 mm build-up?
Curious about bathrooms: if grout lines look fine but there’s a faint musty smell, is over-tiling still a no-go? I’d hate to seal in damp. Also, would BAL Bond SBR be enough on very glossy ceramic, or do you striktly reccomend a grit primer?