A bin is the grubby heart of a kitchen. It’s where onion skins stick, coffee grounds fall, and those mysterious sticky rings appear on the floor by teatime. A pull-out bin doesn’t promise perfection. It does something subtler and smarter: it hides temptation for pets, tucks smells away, and puts the opening exactly where the mess happens — right under the worktop. It’s a small change with an outsized effect on how clean your kitchen looks, and how calm it feels. If your freestanding pedal bin keeps turning into a splattered, stinky totem, this might be your quiet miracle.
It started with a cold slice of toast balanced on a plate, the morning rush humming in a narrow London galley kitchen. Someone had chopped tomatoes, quickly, while the pot boiled. Bits of red and seeds skittered over the chopping board and onto the counter. The old freestanding bin stood by the door, lid slightly ajar, bag peeking out like a tongue.
In my tiny flat, the bin always betrayed the clean-up. I watched my neighbour slide open a base cabinet and—click—there it was: a discreet, double-bucket pull-out. No gymnastic foot pedal. No wobble. Peel, scrape, gone. The floor stayed innocent. The air felt calmer. The sink ran hot, the drawer whispered shut. What happens when the bin disappears?
Why a pull-out bin quietly keeps your kitchen cleaner
A pull-out bin reduces chaos by design. The container lives inside a cupboard, so the lid is sheltered and less likely to carry splashes or greasy fingerprints. You pull the drawer towards you at the exact moment you need it, which means fewer drips tracked across the floor. A pull-out bin removes the most common source of kitchen grime: exposed rubbish.
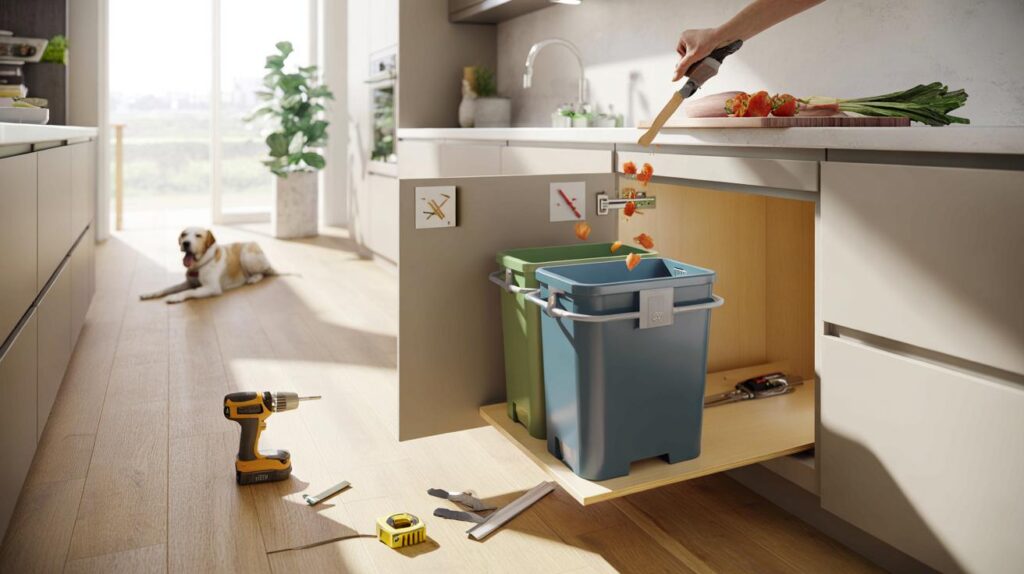
In a family house I visited in Bristol—two kids, one Labrador—the old pedal bin sat in the kitchen’s raceway. It toppled twice a week. The floor around it always needed a wipe, usually right after dinner. They swapped to a door-mounted pull-out under the sink. Seven days later, the mop stayed in the cupboard. Fewer incidents, fewer crumbs, more calm. The dog lost interest instantly because there was nothing to nudge.
There’s logic here. When the bin aperture is inches from the chopping board, the margin for mess shrinks. Soft-close runners stop the slam-splatter you get with lid flaps. The cabinet walls act as a splash guard, protecting nearby surfaces. Separation is simpler too: compost in one bucket, recycling in another, so nothing ferments in the corner of a big, mixed bag. Cleaner inputs, cleaner outputs.
How to fit a pull-out bin in an afternoon (without swearing)
Start with a tape measure. Measure the inside width, depth and height of your chosen cabinet, and note the door style. Pick a kit that suits: in-cabinet frame with its own lid for under-sink, or a door-mounted unit that pulls the whole door as a drawer. Mark pilot holes with masking tape, hold the runners square using a small spirit level, and fix the frame to the base. Slide the bucket cradle on, clip the buckets in, and test the travel. Measure the cabinet opening, not the door.
Common traps are tiny. Allow clearance for hinges and pipework—especially on U-shaped under-sink plumbing. Check the bin’s height against the lowest shelf or trap; some lids need headroom to open fully. Spread the weight: if your cabinet base is thin chipboard, add a plywood plate under the runners to stop sag. And yes, test the full extension with a full bag of peelings before you tidy the tools. Let’s be honest: no one actually does this every day.
Take your time on the small alignments. A skewed runner feels awful after a week.
“Measure twice, then open and close it five times before you tighten the final screws,” says Dan, a kitchen fitter in Leeds. “Your future self will thank you.”
Think in sequences: mark, pre-drill, fix lightly, test, adjust, then tighten.
- Tools: tape measure, pencil, masking tape, drill/driver, 3 mm bit, pozi bit, small level, square.
- Key checks: hinge clearance, pipework, plinth/door swing, bin height, screw length.
- Time guide: 45–90 minutes for a standard base unit; under-sink installs take longer.
Living with a pull-out bin: small habits, big payoff
Once it’s in, the rhythm changes. You scrape straight from board to bucket. You close the drawer and the smells stay contained. The floor area where the old bin lived becomes quiet, even useful—plant, stool, or nothing at all. Use compostable liners for food waste, a shake of baking soda under the bag for odours, and a quick wipe of the bin rim during the Sunday clean. The bin finally stops being a spectacle.
There’s an emotional lift too. Kitchens look cleaner when visual clutter disappears, and a freestanding bin is pure clutter. We’ve all had that moment where guests are due any minute and the bin chooses to reveal last night’s curry. A pull-out bin removes the panic. It nudges tidiness without nagging and makes sorting rubbish feel less like a chore. You’re not perfect. You don’t need to be. The design carries you.
If you rent, look for freestanding pull-out frames that sit inside a cabinet without screws. They’re not as bulletproof as mounted units, but they spare your deposit and still do most of the job. Place a small caddy on the worktop for peelings while you cook, then slide open the bin once to clear the deck. You can retrofit a pull-out bin without rebuilding the kitchen.
| Key points | Details | Interest for reader |
|---|---|---|
| Cleaner by design | Hidden lid, fewer touchpoints, splash protection, soft-close runners | Less daily wiping and fewer smells |
| Easy DIY fit | Measure inside the cabinet, avoid hinges/pipework, test before tightening | One-afternoon upgrade, no contractor needed |
| Works for rentals | Non-drill frames fit inside cupboards; remove when you move | Upgrade without risking deposit |
FAQ :
- What cabinet size do I need for a pull-out bin?A 300–600 mm base unit covers most kits, with 400 and 500 mm the sweet spots. Measure internal width, depth to the back panel, and height to the underside of any shelf or sink.
- Will a pull-out bin smell more inside a cupboard?No, it usually smells less. The cabinet contains odours and the lid fits closer. Use compostable liners, sprinkle baking soda under the bag, and keep ventilation gaps around the door.
- Can I fit one under a sink with tricky pipework?Yes, choose a short-depth or U-shaped model designed for traps. Map your pipe layout with masking tape on the cabinet base and pick a frame that avoids it.
- How do I keep the runners smooth over time?Wipe crumbs from the rails monthly and avoid spraying cleaner directly on bearings. If grit builds up, remove the frame and brush the tracks, then add a light silicone spray.
- How much weight can those buckets take?Quality runners are rated 20–40 kg, which is plenty for domestic rubbish. If you compost wet waste, empty more often to keep strain and odours down.


Great write-up! The ‘measure the opening, not the door’ line is gold. I switched from a wobbly pedal bin and the floor is cleaner, wierdly calmer too. Any brand recs for 400mm base units with U-shaped frames?