A quiet kitchen workhorse takes a beating every day, and the toll shows fastest when winter draws in and heating rises.
Condensation meets hot radiators, knives dig deeper, and beetroot rings linger. That daily grind accelerates wear. Yet a cheap, quick ritual can change the fate of your board and your food prep hygiene.
Why your chopping board is wearing out faster this winter
Wood swells with water and shrinks as it dries. Heating speeds that cycle. Knives open up tiny cuts where liquid pools and odours cling. Acidic fruit, onion juices and meat drips add to the damage. A dishwasher completes the assault with prolonged heat and steam that pry apart glue lines and warp fibres.
Heat, moisture and knife scars: the perfect storm
- Moisture enters along knife grooves and exposed end grain.
- Dry indoor air pulls that moisture back out, causing micro-cracks.
- Acids and pigments bind to unprotected wood and leave stains.
- Prolonged heat softens glues and raises the grain, making boards rough.
Left untreated, wood becomes porous, traps bacteria, smells stale and eventually splits along the grain.
The £2 ritual that shields wood for years
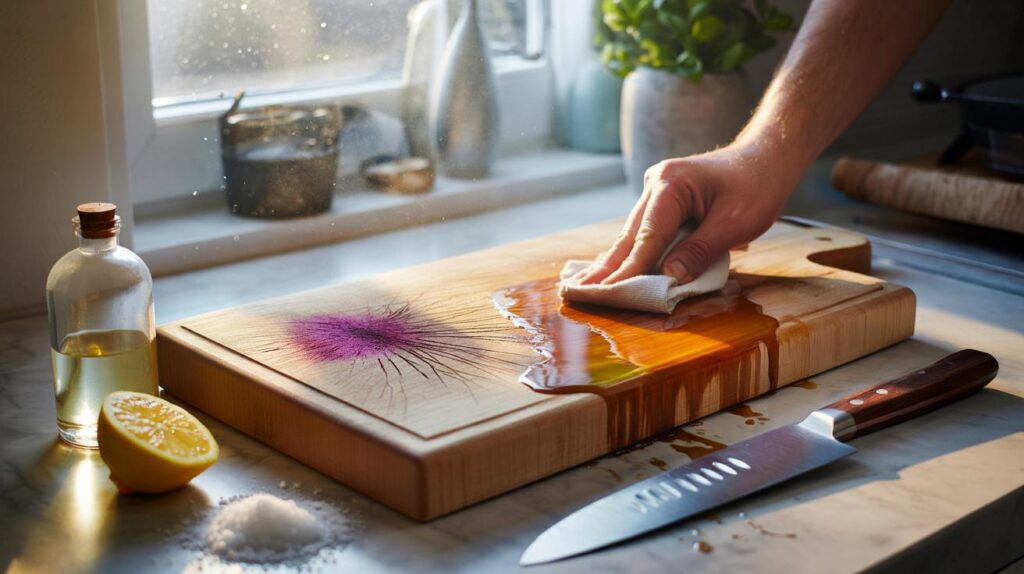
Food-grade mineral oil or a neutral, non-rancid kitchen oil saturates the surface and acts as a moisture barrier. The oil fills the fibres so water, juices and dyes cannot. That barrier keeps the board supple, reduces cracks, and makes cleaning easier. A small bottle costs a couple of pounds and lasts months.
How oiling blocks water, stains and smells
When the wood is saturated, liquids bead rather than soak. Bacteria struggle to lodge in dry fibres. Odours do not linger. The board keeps its mellow colour and a smooth, knife-friendly surface. Your knives stay sharper too because oiled wood offers less resistance and fewer raised fibres.
Oil every 6–8 weeks, or immediately when the surface looks pale, rough or patchy after washing.
Step-by-step: oil your board like a pro
- Wash the board with hot water and a drop of washing-up liquid. Rinse well.
- Dry thoroughly with a clean tea towel. Stand it upright for 30 minutes.
- Pour 1 tablespoon of food-grade mineral oil onto the surface.
- Massage the oil in with a lint-free cloth, working with the grain.
- Pay special attention to edges and end grain. They soak up oil first.
- Leave for at least 30 minutes. For very dry boards, leave overnight.
- Wipe off any excess. Repeat if the surface looks dry immediately after.
Always treat both faces and all edges. Uneven oiling can encourage warping.
Which oil should you choose?
| Oil | Pros | Cons | Best use |
|---|---|---|---|
| Food-grade mineral oil | Stable, odourless, cheap, widely available | Needs reapplication every 1–2 months | All wood boards, routine maintenance |
| Grapeseed oil | Neutral scent and taste, good penetration | Can oxidise over time if stored badly | Quick top-ups on dry boards |
| Walnut or raw linseed (food-safe) | Polymerises to a tougher finish | Nut allergy risk; longer curing time | End-grain boards, occasional deep treatment |
| Avoid: olive, sunflower | — | Can go sticky or rancid, leaving odours | Not recommended |
Daily habits that stop warping and bacteria
- Wash promptly after use. Hot water and a small amount of washing-up liquid work well.
- Never soak the board. A sink bath forces water deep into the fibres.
- Dry immediately. Stand the board on its edge to allow airflow on both faces.
- Keep it out of the dishwasher. Heat and steam are wood’s worst enemies.
- Rotate faces. Use one side for fruit and bread, the other for onions, garlic and raw meat prep.
- Deodorise with coarse salt and half a lemon. Scrub, wait five minutes, then rinse and dry.
- Lift stubborn stains with a baking soda paste. Rinse, dry, then oil.
- Sanitise occasionally with white vinegar or 3% hydrogen peroxide. Wipe, wait one minute, then rinse and dry.
Do not put a wooden board in the dishwasher. Prolonged heat and steam warp and split wood.
End-grain vs edge-grain: does it change the care?
End-grain boards (checkerboard pattern) absorb oil quickly and self-heal knife marks better. They need slightly more oil, especially on the ends. Edge-grain boards (stripes along the length) drink less oil and are lighter to handle. Both benefit from the same routine: wash, dry, oil, repeat.
When to recondition or replace
- Sand and revive: if the surface feels fuzzy or shows shallow grooves. Use 180–220 grit paper, then oil.
- Replace: if deep cuts exceed 3 mm, if a crack runs through the thickness, or if the board rocks due to warping.
- Check glue lines on laminated boards. Gaps invite water and germs and are hard to rescue.
A 10-minute sand and oil can add years to a solid board. Deep splits call for retirement.
The quiet pay-off: sharper knives, cleaner prep, lower waste
Oiled wood cushions blades. Your knives dull more slowly, and cuts feel smoother. Food odours do not creep from last night’s onions into today’s apples. You throw away fewer boards, spend less money, and send less timber to the bin. A small, regular routine beats costly replacements.
A simple maintenance calendar you can actually keep
- Daily: wash, rinse, dry upright.
- Weekly: quick deodorise with salt and lemon or a vinegar wipe if you prepped strong-smelling foods.
- Every 6–8 weeks: oil both faces and edges. Mark it on your phone.
- Quarterly: light sand if the surface raises; then oil.
Budget check: a 250 ml bottle of food-grade mineral oil costs around £3–£4 and covers 8–12 full applications. That means well under 50p per treatment for a standard board. Replace one £25 board avoided per year and the maths looks good.
Food safety notes that home cooks often miss
Use separate boards or sides for raw meat and ready-to-eat foods. Clean immediately after raw meat prep and sanitise with vinegar or hydrogen peroxide. Rinse and dry. Do not store a damp board flat. Moisture trapped beneath invites mould. Leave a small gap to let air pass under it, or stand it on edge.
If you host someone with nut allergies, avoid nut-based oils for finishing. Stick to mineral oil. For bamboo, expect faster absorption at first; it is dense yet thirsty. Give it a second light coat after an hour, then wipe.
If you have five minutes today, do this
- Wipe the board dry and stand it up.
- Run your palm across the surface. If it feels dry or chalky, oil tonight.
- Check edges for pale, rough patches. Those spots need extra attention.
Five minutes now prevents five costly problems later: warping, cracks, stains, smells and slippery prep.
Going further: rescue a tired heirloom board
Clamp the board and sand evenly from 120 to 220 grit, following the grain. Vacuum dust, wipe with a barely damp cloth, allow to dry, and apply two thin coats of mineral oil. Finish with a beeswax and oil blend for extra water resistance. Leave to cure overnight before use. This light restoration suits beech, walnut and oak boards and can return a dull surface to a warm, tight grain.
For renters and small kitchens, choose a medium end-grain block for daily chopping and a thin edge-grain plank for serving. Maintain both on the same oiling cycle. Your knives will glide, your board will smell fresh, and your winter cooking will feel calmer and cleaner.


Just did the wash-dry-oil routine on my knackered beech board and wow—the water beads now and it smells less ‘oniony’. I’d been chucking it in the dishwahser (oops) and the edges went pale and fuzzy. The step about standing it upright for 30 mins before oiling was the missing piece for me. I’ll set a reminder to oil every 6-8 weeks; seems do-able and way cheaper than buying a new one. Thanks for the clear, no-faff guide!
Is food-grade mineral oil actually safe on something we prep food on? It’s derived from petroleum, right. Why not fractionated coconut oil or tallow—do they go rancid faster, or am I overthinking?