A wobble here, a sticking drawer there, and guests on the way. Small DIY slips can snowball when time and nerves fray.
As autumn pushes more of us indoors and budgets tighten, flat-pack builds are back on kitchen floors. Returns feel slow, trades are booked, and half-built frames glare from living rooms. Here is a fast, low-cost rescue plan that turns a near miss into a sturdy win.
Autumn’s flat-pack crunch: why your weekend build goes wrong
Colder weekends invite makeovers and storage overhauls. That means boxes, cams and dowels arrive in the hallway. Many failures start with haste, poor lighting, or missing checks. Minor clues appear early. A door scrapes. A side panel sits proud. A shelf leans. Tackle these signals before the final panel goes on.
Most flat-pack failures start small: rubbing doors, rocking frames, loose cams, or dowels that spin in their holes.
Cost-of-living pressures nudge people to fix, not replace. Hardware aisles now stock repair inserts, corner braces and retouch wax in neat kits. Shoppers buy them to avoid delays and fees. Simple parts, used right, beat a full strip-down.
Spot the warning signs in 60 seconds
A quick inspection prevents a bigger mess. Scan for gaps, twist, and uneven weight. Look at hinges, cams and feet. Check each corner and joint with a firm hand.
| Symptom | Likely cause | Five‑minute fix |
|---|---|---|
| Door rubs the frame | Hinge offset or carcass out of square | Loosen hinge screws, nudge door, retighten; verify squareness with a level |
| Drawer jams halfway | Runner misaligned or one screw high | Back off runner screws, realign to pilot marks, tighten gently in sequence |
| Top panel rocks | Uneven floor or one cam under-torqued | Tighten cams equally; add a thin felt pad or shim to the low leg |
| Side panel bowing | Dowel in wrong hole or overdriven screw | Pull the dowel with pliers, relocate, seat with wood glue |
| Fixing spins without biting | Stripped chipboard hole | Install a threaded insert or repair plug; refit with a longer screw |
The 15-minute rescue plan
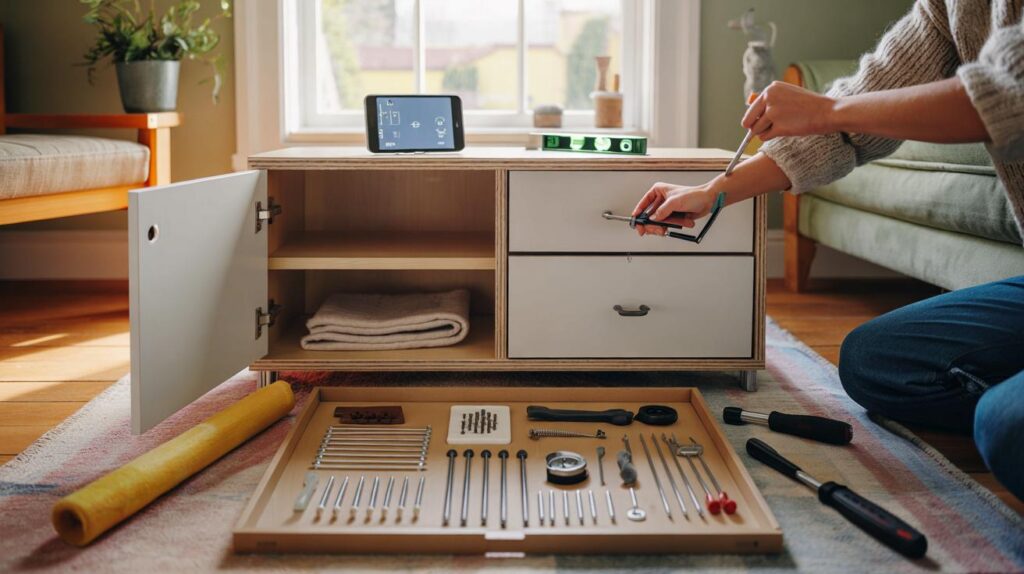
Work in small moves. Avoid full disassembly if the frame holds. Put the piece upright on a firm surface. Clear the load. Keep screws and cams within reach in a tray lid.
- Retighten every accessible cam and screw by a quarter turn each. Balance torque across pairs.
- Use a rubber mallet and a folded cloth to tap joints flush without bruising edges.
- Check level with your phone’s bubble app on the top, sides and shelves. Adjust one point at a time.
- If a dowel is misplaced, twist it out with thin-nose pliers. Re-seat it with a smear of wood glue.
- Realign runners by loosening both ends, setting a straight line, then tightening in alternating screws.
- Correct a twist by loosening the back panel, squaring the carcass, and refastening from corner to corner.
- Stop at the first stable result. Test doors and drawers under light load, then heavier load.
Tighten first, align second, reinforce third. Most wobbles yield once loads are balanced across the frame.
Tools and spares that save the day for under £20
A small kit prevents panic and cuts returns. These items fit a shoebox and cover almost every mishap.
- Crosshead and flat screwdrivers, plus a 4 mm and 5 mm hex key
- Rubber mallet and soft cloth
- Wood glue and quick‑drying filler or repair putty
- Assorted 6–8 mm dowels and universal screws (16–30 mm)
- Threaded inserts for chipboard and cam locks
- Two small L‑brackets and a mending plate
- Self‑adhesive felt pads and slim shims
- Retouch wax or wood marker in a near match
When damage bites: make repairs that last
Split chipboard and loose fixings look fatal, yet both accept robust repairs. A stripped hole can house a threaded insert. The insert gives fresh metal threads and a stronger bite. A spinning dowel can be reset with glue and a sliver of matchstick as a wedge. Leave it to set before loading.
Cracked edges respond to glue and clamps. Push glue deep with a thin spatula. Clamp gently to avoid crushing. Wipe squeeze-out quickly. Once dry, fit a discreet bracket inside the cabinet to spread forces. A thin back board, nailed from opposite corners, squares a racked carcass and stiffens the whole unit.
Marks and chips draw the eye but rarely affect strength. Retouch wax hides white chip edges. A fine-tip marker blends grain. Focus structural effort on joints, then tidy the finish. That order gives reliability and speed.
A £2 threaded insert can outperform the factory hole and stop repeat failures under daily loads.
Stability tricks pros swear by
Square the box before anything else. Measure diagonals; when they match, the carcass is true. Fix the back panel in a zig-zag pattern: top left, bottom right, top right, bottom left. That locks the square. Add felt pads to level feet on hard floors. Slip a thin shim under the lowest corner. Where makers supply straps, anchor tall units to the wall. That prevents tip risks and calms door swing.
Avoid a repeat next time
Lay out every board, label upright edges with painter’s tape, and group fixings in small bowls. Count cams and dowels against the manual. Photograph each bag before opening. That helps when part codes look similar. Mark pilot holes lightly with a pencil where diagrams confuse. Pre-thread cam bolts by hand to feel resistance, not by driver, to avoid cross‑threading.
Plan the build on a rug or blanket to protect edges. Commit to steady lighting. Work in pairs for tall sides. Dry‑fit runners and hinges before final tightening. Stop to check level after each major panel. A pause beats a rework. If you add glue, allow stated cure time before loading shelves.
Extra angles that matter to households
Returns policies often exclude damage from assembly. A tidy repair can keep your warranty intact if you avoid drilling visible faces. Keep receipts and the manual. Note any missing or defective fixings early and request replacements before forcing parts together.
Renters face different risks. Wall anchors may need approvals. Use freestanding anti‑tip devices or pressure mounts where drilling is restricted. In homes with children, fit safety catches and always anchor tall storage. Weight ratings on shelves are real. Place heavy items low and centred to reduce racking forces.
Think about future moves. Threaded inserts and brackets add service life through disassembly cycles. Felt pads protect floors and keep units level on old boards. Moisture swells chipboard, so avoid wet mopping under panels. Lift the unit onto sliders when cleaning to prevent leg stress.
If time is tight, triage the job. Fix the functional faults first: wobble, door rub, drawer travel. Cosmetic tweaks can wait. A 15‑minute plan, a few £2 parts, and a calmer approach usually turn a shaky frame into a dependable piece you can actually use tonight.


Just tightened every cam by a quarter turn and used felt pads—wobble gone in 10 mins. Saved my Sunday, cheers! 🙂 Also, the phone level tip is genius.
Seventeen minutes? Sounds optimistic. What about units with swollen chipboard edges—glue and clamps won’t cure that overnite. Any tips for fixing blown-out cam holes without buying inserts?