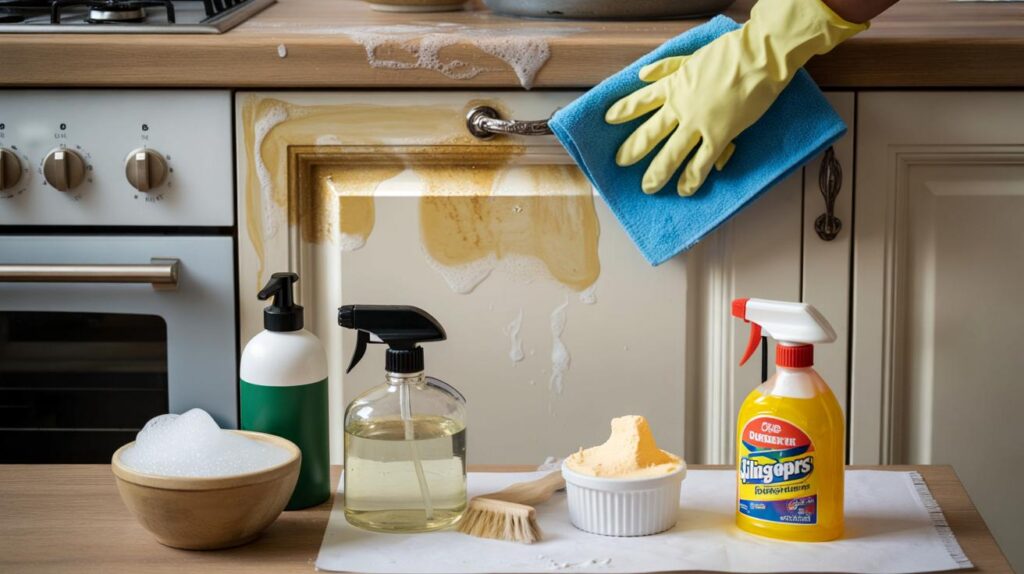
British households are battling sticky kitchens as cooking splatter rises with winter comfort food and energy-saving batch cooking habits nationwide.
With more meals made at home and fry-ups on the menu, cabinet doors are taking the brunt. Here’s what actually cuts through greasy films fast, what to avoid on wood finishes, and how to stop the build-up returning.
Why grease build-up is rising in home kitchens
Grease forms when hot fat aerosolises and cools on nearby surfaces. Door fronts near the hob catch it first; upper cabinets collect the most. Dark colours hide the haze until it turns tacky. Pale paints reveal yellowing. Open-plan layouts spread vapours beyond the cooker area.
Heat, fat and time are the trio that create cabinet grime. Break any one of them and cleaning gets easier.
Range hoods that vent outside remove vapours efficiently. Recirculating filters help, but they need regular changes or they simply push warm, greasy air around the room.
What to do before you start
- Open a window or run the extractor on high if you plan to use a chemical spray.
- Wear washing-up gloves to protect skin from surfactants and solvents.
- Test your chosen method on a hidden edge or the top of a door.
- Avoid flooding timber. Excess water can swell veneers and raise grain.
- Work from the bottom up to prevent drips streaking clean sections.
Always test, never soak: a small patch trial and light moisture keep finishes intact.
The four methods that actually shift grease
Dish soap and warm water
For fresh splatter and light film, a basic wash beats fancy sprays. Detergent lifts oil so you can wipe it away.
- Add 3–4 drops of washing-up liquid to 500 ml warm water.
- Wring a microfibre cloth until just damp; wipe with the grain on wood.
- Rinse the cloth often; change the solution when cloudy.
- Buff dry with a towel to remove any surfactant sheen.
Best for: painted doors, laminate, sealed timber. Skip this as a sole method on months-old residue.
Vinegar and water solution
Mild acidity dissolves the film that soap can leave behind and helps cut through older patches of grease.
- Mix equal parts warm water and white vinegar in a spray bottle.
- Mist lightly onto the door; don’t drench the surface.
- Wait 2–3 minutes, then wipe with a damp cloth.
- Agitate corners and mouldings with a soft-bristle brush.
Best for: laminate and most painted finishes. Avoid on waxed wood or natural stone splashbacks nearby.
Baking soda paste
A gentle alkali paste breaks down stubborn, oxidised grease without scratching if used with a soft cloth.
- Stir two parts bicarbonate of soda with one part water to form a spreadable paste.
- Apply to sticky handles and along door edges where fingers touch most.
- Leave for 2–5 minutes, then wipe in short strokes. Rinse residue with a damp cloth.
- Dry thoroughly to prevent a powdery film.
Best for: enamel, metal pulls, and sealed wood. Do not rub hard on high-gloss acrylic doors.
Commercial degreasers
When cabinets feel tarry, a purpose-made cleaner saves time. Choose a kitchen-safe formula labelled for the surface you own.
- Pick a citrus or plant-based spray for painted and laminate doors; use oven-strength only on metal trims.
- Spritz a cloth, not the cabinet, to control wetting on wood.
- Let it dwell for the time on the label, then wipe and follow with a damp cloth.
- Ventilate well and keep pets and children away until surfaces are dry.
Typical spend: £4–£8 per bottle. One bottle covers multiple deep cleans across a small kitchen.
Quick comparison: cost, dwell time and risk
| Method | Approximate cost per clean | Typical dwell time | Surface risk |
|---|---|---|---|
| Dish soap + warm water | 10p–15p | 0–1 minute | Low on sealed finishes |
| Vinegar + water | 15p–20p | 2–3 minutes | Medium on waxed wood |
| Baking soda paste | 20p–30p | 2–5 minutes | Medium on high-gloss acrylic |
| Commercial degreaser | 40p–£1 | 1–5 minutes | Varies; test first |
Match the method to the mess: start gentle, step up only if the stain persists after a light pass.
Stubborn spots on different finishes
- Painted timber: use soap first, then a brief vinegar mist. If paint feels chalky, stop and switch to a damp cloth only.
- Veneer or laminate: safe with all four methods; avoid abrasive pads on edges to protect the thin face.
- Oiled wood: skip vinegar and commercial sprays. Use diluted soap and re-oil handles and edges afterwards.
- High-gloss acrylic: no powders. Use soap, then a plastic-safe degreaser with a microfibre cloth.
Preventive steps that save you cleaning time
Grease prevention costs pennies and trims clean-up time each week.
- Run the extractor on high and keep it running for 10 minutes after cooking.
- Wipe doors near the hob immediately after frying; a 30-second pass prevents hard films.
- Degrease handles every two days; skin oils attract airborne particles.
- Add a protective topcoat to vulnerable areas: clear water-based polyurethane on painted timber, or a laminate sealer where compatible.
Little and often beats marathon scrubs. A weekly two-minute wipe keeps the shine and protects finishes.
Common mistakes to avoid
- Spraying directly onto wood grain, which drives moisture into joints.
- Using scouring powders or steel wool on lacquer and laminate.
- Mixing chemicals; for example, ammonia-based cleaners with bleach produce dangerous gases.
- Ignoring the tops of wall units, where thick deposits can drip down in warmer months.
Toolkit that actually helps
- Two microfibre cloths: one damp for cleaning, one dry for buffing.
- Soft detailing brush: reaches rail profiles and hinge recesses.
- Trigger bottle with measurement marks: easy 1:1 mixes for vinegar solutions.
- Plastic scraper: lifts baked-on blobs from lacquer and metal without scratching.
Extra guidance and when to escalate
If a door feels rough after cleaning, the grease may have etched the topcoat. Lightly denib with a fine non-scratch pad, wipe dust, then apply a matching clear varnish to seal. This prevents new dirt from clinging to a damaged patch.
Where water rings or edge swelling appear on timber, move to repair rather than repeated washing. Gentle heat and a dry cloth can draw light moisture from a veneer. Persistent swelling points to a failed seal; a joiner can re-edge or replace a single door far cheaper than a whole-kitchen refit.
For households cooking daily, schedule a 5–10 minute cabinet wipe on the same day each week. Rotate zones: week one focuses on doors beside the hob, week two on high-touch handles and bins, week three on glass fronts and appliance panels. This keeps effort predictable and prevents the return of that tell-tale tacky film.
If you prefer greener products, look for degreasers with plant-derived surfactants and d-limonene from citrus. They work well on polymer and painted surfaces, and the light scent masks cooking odours without heavy perfumes. Always check the label for compatibility with your finish.


Just tested the dish soap + warm water after a bacon splatter session, and it beat my “pro” cleaner hands down. The buff-dry step removed that weird surfactant sheen—nice touch. Simple, cheap, actually works. Thanks for the with-the-grain reminder on wood.