Biting evenings draw you home, and blank walls loom large. A gleaming mirror tempts, but mess, noise and repairs haunt decisions.
Across rentals and freshly painted homes, a quiet shift is underway: people want big mirrors without dust, plugs or holes. The promise sounds bold. The question is practical. Can a no-drill fix carry real weight through changing seasons, moisture swings and daily bumps?
Why people are ditching drills for heavy mirrors
Many UK walls hide surprises. Plasterboard, crumbly skim coats and old brick react differently to drilling. One slip can nick a hidden cable or fracture plaster. Ten minutes of drilling often means hours of filling, sanding and repainting. For renters, one hole can spark a deposit dispute.
That pushback fuels interest in heavy-duty double-sided tapes and mirror-safe mounting pads. The aim is simple: firm hold, clean finish, zero rubble. Yet success depends on careful product choice, proper wall prep and load management.
Skip the hole, not the homework. Surface preparation and load planning decide whether your mirror stays up or creeps down.
The tape revolution: what actually holds weight
What to look for on the packet
- Load rating per strip or per 10 cm section, expressed in kilograms or grams.
- Material compatibility: painted walls, tiles, timber, glass and mirror backing.
- Adhesive type: acrylic foam tapes tend to offer strong, long-term grip and resist temperature swings.
- Width: 20 mm or wider spreads stress and improves bond strength.
- Mirror-safe claim: protects silvering on mirror backs by avoiding corrosive adhesives.
A practical baseline: plan roughly one 10–15 cm strip per kilogram of mirror weight, spaced around the perimeter and across the centre. For a 9 kg mirror, that means nine medium strips placed with intention. Wider, continuous runs perform better than a few chunky pads because they spread the load.
Where tapes excel — and where they do not
Tapes grip best on smooth, clean, dry, non-porous surfaces. Satin or eggshell paint, sealed plaster, lacquered timber, glazed tile and glass all help. Dusty, flaking or damp surfaces undermine adhesion. Raw, chalky plaster needs sealing before any attempt at taping.
| Wall type | Adhesion outlook | Preparation note |
|---|---|---|
| Painted plaster (sound, satin) | Good | Degrease, dry fully, avoid fresh paint < 7 days |
| Plasterboard with matte powdery paint | Risky | Clean, lightly denib, seal with clear coat |
| Glazed tile | Very good | Degrease with alcohol or acetone, wipe dry |
| Wallpaper (textured or vinyl) | Poor | Avoid; bond to wallboard or frame instead |
| Unsealed plaster or dusty skim | Poor | Prime or seal before taping |
| Bathroom wall with high humidity | Variable | Ventilate, warm the wall, choose moisture-rated tape |
Clean, dry, smooth. Miss one of these, and even the priciest tape behaves like weak stationery.
The step-by-step method that actually works
1) Measure weight and plan the layout
Weigh the mirror or use the manufacturer’s figure. Sketch the tape pattern: a full perimeter, plus vertical and horizontal runs to brace the centre. Keep strips a few centimetres in from the edge to hide them while maximising grip.
2) Prepare the wall and the mirror back
- Dust both surfaces with a dry, lint-free cloth.
- Degrease with isopropyl alcohol or household methylated spirits on a clean cloth.
- Allow complete drying. Residual moisture weakens the initial bond.
- If the paint feels chalky, seal with a clear, quick-drying primer and leave to cure.
New paint needs time. A rule of thumb is seven days before you trust tape on it. Cold rooms slow curing and reduce tack, so warm the space to a steady room temperature first.
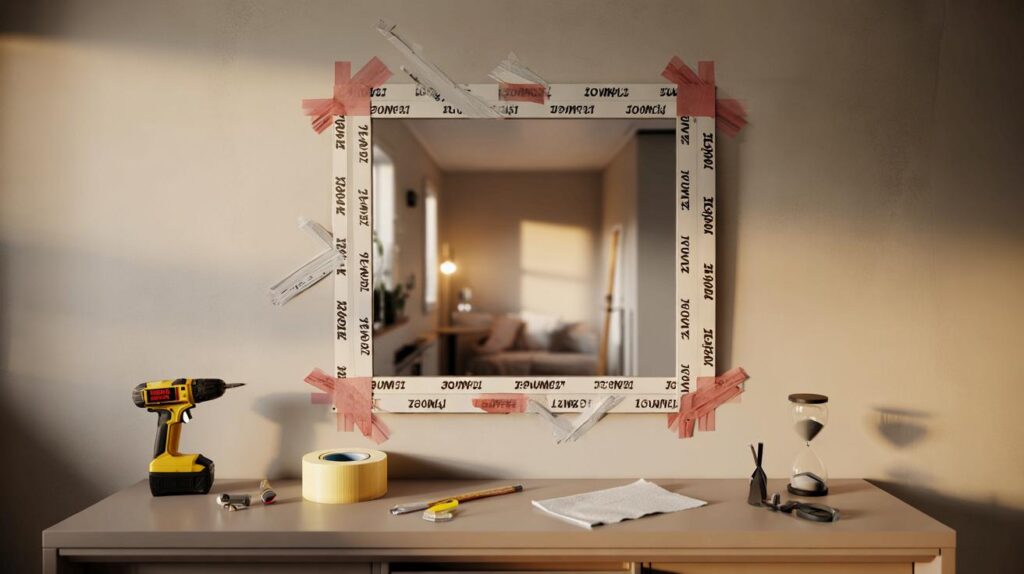
3) Apply the tape with pressure, not haste
Lay the mirror face-down on a soft blanket. Apply tape strips firmly to the back, pressing along each length to activate the adhesive. Do not overlap strips, as overlaps can trap air.
Offer the mirror to the wall using a light pencil level line. Once aligned, commit. Start from the top edge, press the perimeter, then the cross runs. Maintain steady pressure for at least 30 seconds per strip to build the bond. Avoid sliding the mirror during this stage.
4) Let it settle
Many tapes reach working strength quickly but develop full strength over 24–72 hours. During this period, avoid slamming doors, heavy impacts or temperature shocks in the room. If your room swings from heated to chilly evenings, keep it stable while the bond matures.
Plan for 24–72 hours of quiet curing. The first days decide the next twelve months.
Safety, longevity and the checks that prevent drama
Place mirrors away from slam-prone doors and lively play zones. High-humidity bathrooms with weak extraction challenge any adhesive. If you must mount near steam, ventilate well, and choose a moisture-rated, mirror-safe tape. Even then, reassess during wetter months.
Every two to three months, take a minute to inspect. Look for corner lift, a faint tilt or any shadow gap. At the first sign of creep, relieve the load and renew the tape. Do not wait for a slide to become a drop.
- Mind pets and children. Bumps concentrate stress on small sections of tape.
- Avoid partial removals and re-sticks. Fresh tape on clean surfaces beats recycled adhesive.
- If the mirror has hanging hardware, do not leave loose metal that can press into paint and cause dents.
Real-world numbers you can use
A practical planning ratio keeps things honest. Aim for one 10–15 cm strip per kilogram of mirror, then add a 20 percent margin for seasonal changes. A 10 kg mirror would then use 12 strips of that size or fewer longer runs that match the same total length. Wider tape improves reliability because it lowers stress per square centimetre.
Temperature affects performance. Cold rooms reduce tack during application. Warm both wall and tape to around 18–22°C before bonding. In summer heat, keep direct sunlight off the mirror during cure, as rapid thermal expansion can start a micro-gap that grows later.
When no-drill is the wrong call
Some situations demand mechanical fixings. If the wall is textured, flaky, or permanently damp, tape becomes a gamble. Mirrors above 15–20 kg push most household tapes near their limits. If in doubt, consider a French cleat rail anchored into studs, or consult a professional for hidden fixings that protect the mirror backing and the wall.
Extra tips that save time, paint and nerves
Removal without carnage
Plan an exit. Many foam tapes release cleanly when cut behind the mirror with dental floss or a thin plastic wire, pulled in a sawing motion. Patience beats force. Any residue lifts with adhesive remover and a soft cloth. Test removers on a hidden patch of paint first.
Use a test tile
If you feel uncertain, bond a small offcut tile or scrap board using the same routine on a nearby hidden patch. Check it after a week. That low-risk rehearsal reveals whether your surface and tape play well together.
One quiet test strip today prevents a noisy crash tomorrow.
Going further: framing, weight reduction and alternatives
A timber or aluminium frame reduces stress by stiffening the mirror and spreading load. Some framers fit lightweight honeycomb backers that cut overall weight by 10–30 percent. Less weight means fewer strips and a bigger safety margin.
For tricky bathrooms, consider a mirror bonded directly to tile with a removable mirror adhesive rated for damp areas. It requires careful curing time and a release plan, yet outperforms tape where steam lingers daily.
What this means for your home
A no-drill mirror can hold firm through autumn and beyond if you treat the bond like a system: suitable tape, clean surfaces, decent temperature, even load, and routine checks. The cost stays modest — often £10–£20 in materials — while the wall remains intact for future moves or redecorations.
Add a spirit level, a roll of painter’s tape for alignment marks, and twenty quiet minutes. The result is a brighter hallway, a fresher bedroom and a deposit-friendly wall that hides the effort behind a clear reflection.


I used 3M VHB on an 8 kg mirror last winter—no drilling, still up after 14 months. Prep was everything: IPA wipe, warm room, full perimiter strips and center cross. Your point about waiting 7+ days on fresh paint is spot on.
£12 tape to hold 10 kg for a year? My landlord anxiety says nope. What’s the failure mode here—slow creep or a 3 a.m. thud?