Across Britain, gardeners swap whispers about a chilly-season trick that brings wood to life without heaters or greenhouses.
As nights lengthen and allotments quieten, a lean technique is drawing crowds: turn a single fig cutting into a rooted plant in days, not months. The method borrows from pro benches, uses pantry items, and costs pocket change.
Why autumn shifts the odds in your favour
Fig trees slow their top growth as temperatures dip, yet many still push roots in cool, moist soil. That balance suits propagation. You avoid scorch, conserve water, and shield tender wood from summer stress. Cold snaps lurk, but brief chills often help harden tissue.
Gardeners from Cornwall to the Cairngorms report a similar pattern. Keep the rooting zone evenly damp. Keep air still but fresh. Keep light gentle. Do this, and a fig cutting often swells buds by day ten and knits roots by week four.
Target a 15–20 cm cutting, roughly pencil-thick, with three to five clear buds and no stains or scars.
The horticulturist’s ten-day method, step by step
1. Choose the right wood
Pick one-year growth. It should feel firm, not floppy, and not woody like older stems. Favour straight pieces from well-lit sections, not shaded inner branches. Avoid tips that look soft or split.
Use clean, sharp secateurs. Cut just below a node at the base and just above a node at the top. A diagonal top cut helps you spot which end faces up.
2. Prepare a lean rooting mix
Blend half multi‑purpose compost with half sharp sand or perlite. The mix drains fast yet holds a light film of moisture. Cold soil turns sodden easily, so keep it airy.
Fill a 2–3 litre pot for four cuttings, or a narrow trench for a row. Firm gently. Water once to settle.
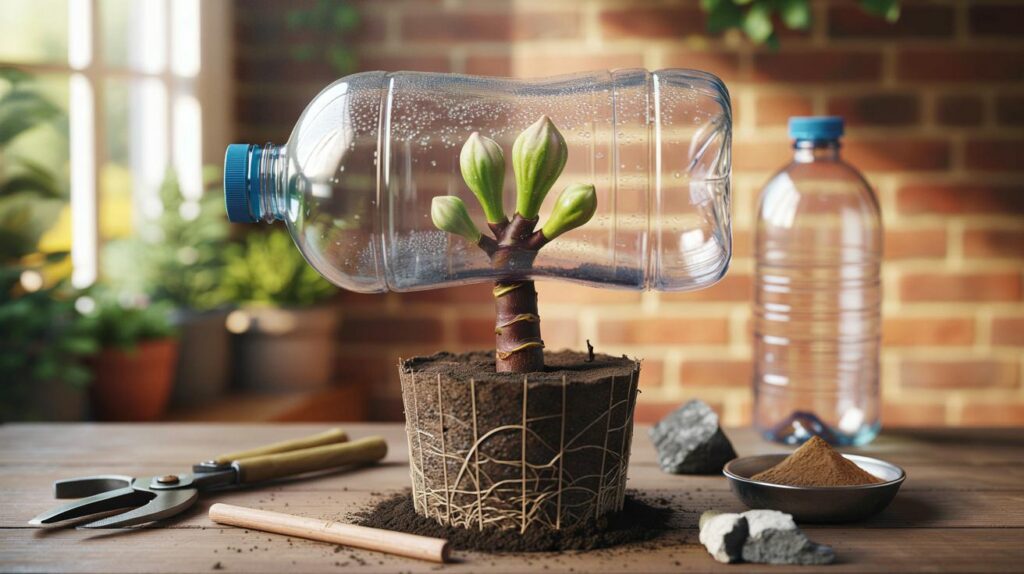
3. Build a cheap, stable microclimate
Push the cutting two nodes deep. Firm the collar. Slip a clear 1.5‑litre bottle, base removed, over the cutting. Cap off for airflow or on for extra warmth during a frosty night. A cloche does the same job for a row.
Dust the base cut with ground cinnamon or a pinch of charcoal if you like. Both create a drier, cleaner surface. A commercial rooting gel can help, yet figs root well without it.
Keep the rooting zone at 12–18°C, steady, with bright shade. Think cool porch, cold frame, or a south wall out of wind.
Does the moon matter?
Many gardeners time cuttings with a descending moon, arguing that sap sits lower and roots start faster. The claim stirs debate. Some note better success between 12 and 26 October this year, when that phase fell. Others see no change.
If lunar timing boosts your confidence, use it. Confidence makes you prepare well, check moisture, and act at once when growth stirs. Those habits drive success.
What you should see, day by day
- Days 1–3: buds look tight; the cutting feels plump; no mould on the collar.
- Days 4–7: bud scales loosen; the bark brightens; fine callus forms at the base.
- Days 8–10: buds swell; a faint ridge shows where roots will break.
- Days 14–21: a gentle tug meets resistance; hair roots lace the pot edge.
- Days 28–35: first leaves unfurl; watering needs rise.
Do not feed yet. Roots search harder in lean media and branch more densely.
Tools and costs you can keep under £5
- Sharp secateurs you already own
- 1 bag sharp sand or perlite, about £3
- Clean clear bottle, repurposed, £0
- Small sachet of cinnamon or a lump of charcoal, £0–£2
- Label and pencil, pennies only
Placement, watering and light
Set the pot against a sheltered wall or in a cold frame. Give bright, indirect light. Direct noon sun dries the collar and stresses buds. Water with a light hand. Aim for evenly moist, never wet. Lift the bottle a touch each afternoon to swap air and release condensation.
Watch for grey fuzz or slime near the base. If you spot it, remove the cover, trim to clean tissue, dust lightly with cinnamon, and reset the bottle with the cap open.
Training your baby fig for spring
Once roots circle the pot, move the plant to a one‑litre container. Plant slightly deeper than the original line. Choose a free‑draining compost with a third grit. Pinch after the fifth leaf to build a low framework. Stake in windy spots.
Shift to a final position after last frost. Against a south‑facing wall, figs ripen more evenly. In colder regions, large containers let you roll plants to shelter in cold snaps.
Timing and tasks at a glance
| Calendar week | Task | What a healthy cutting shows |
|---|---|---|
| Week 1 | Set up pot, cover, and moisture routine | Firm bark, no rot, buds start to loosen |
| Week 2 | Air daily, water lightly when surface dries | Bud swell, slight callus at base |
| Week 3–4 | Gentle tug test, pot on if roots show | Resistance felt, first leaf forms |
| Spring | Plant out, tie in, shape framework | Strong new shoots, steady water use |
Risks, fixes and realistic yields
Cold snaps below -3°C can blacken new leaf. Use fleece or move pots indoors overnight. Waterlogging invites rot. Punch extra drainage holes if saucers hold water. Long, thin cuttings dry out fast. Trim to 15–20 cm and try again.
Success rates vary. A careful gardener often roots 6–8 cuttings out of 10 in cool weather. Warmer rooms can speed leaf growth but may weaken roots. Aim for steady, not hot.
A single well‑sited tree can give 3–8 kg of fruit by its third or fourth year, depending on variety, pruning and summer warmth. Container trees crop lightly but fit small patios. Birds arrive first in late summer, so netting helps.
Beyond the fig: what this teaches your plot
This routine works for other soft‑wooded fruit with small tweaks. Mulberries favour even sandier mixes. Grapes prefer heel cuttings. Pomegranates root in similar conditions but like a notch warmer. Test two media side by side and label your pots. You will keep the method that matches your space.
Mind local rules if you propagate named varieties covered by plant breeders’ rights. Share swaps within clubs that allow them. Keep notes on dates, weather and placements. Next year, match your best results to temperature, light and moon phase if you track it. You will build a repeatable system and spend less on new trees.


Tried this today with a pencil‑thick cutting and a 1.5L bottle—brilliant guide! The step‑by‑step and the “no feed yet” tip were gold. Thanks, I’m definitley saving this for my allotment notes.