When it comes to our hair we’re always looking for ways to reinvent our look with minimal effort. The less fuss the better! That’s where the easy up-do comes in.
Every day hairstyles can get a little #yawn but the French plait never fails to keep your locks looking all kinds of modern at all times.
For a wearable daytime look go brushed out and baggy by teasing out a few strands at the front. Use your two thumbs either side of the braid to gently tease and pull the hair for a loose finish. This will also give the illusion of thicker hair!
By night, go for a more pulled together look by wearing your French plait tighter. Secure with plenty of glossy lacquer for a high-fashion approach to the classic schoolgirl hairstyle.
And of course, here's your definitive step by step guide to perfecting the French braid.
Here's how it's done
1. Section it
For a styled tight braid, section the hair into three parts from the hairline just like you would with a normal plait.
Alternatively for a looser style, brush your hair back, gather the top centre section from the front of your hairline back to your crown and tie with a clear elastic to secure this section. The braid will then start from further back giving it a gorgeous waterfall effect.
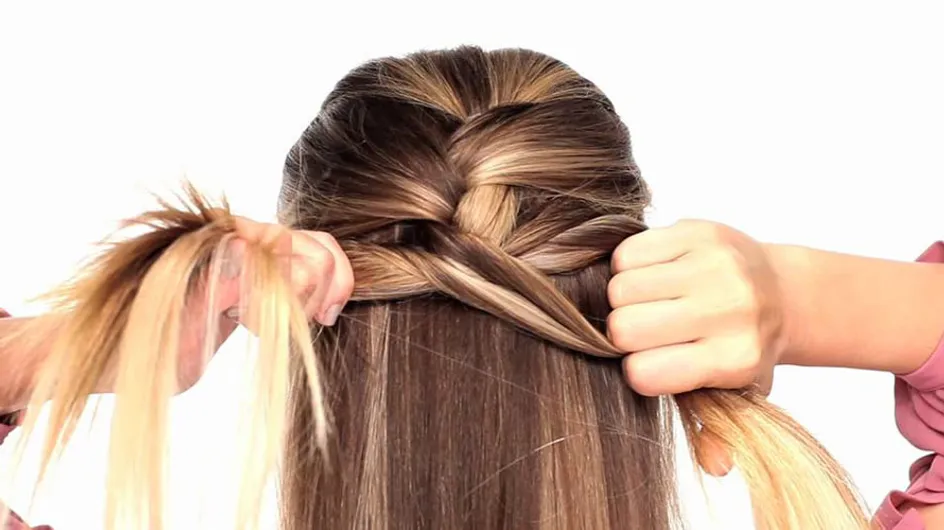
2. Criss cross
Cross the two sections either side of the middle over the centre section.
3. Tease in another piece of hair
Add a new piece of hair from the outside into each section as you go.
4. Continue down to the neckline
Keep crossing over the sections right the way down to your neckline.
5. Tighten
Tease the hair through and tidy and tighten each time you cross over to avoid any unwanted lumps and bumps.
6. Finish up!
Pull the remainder of your hair around your shoulder to finish with a regular plait.
And you're done. Now all that's left to decide is what makeup to team with your hot new up-do... oh, and take a shameless selfie!
With thanks to Roxy Farrier and Michaela Galvin Jo Hansford Salon Mayfair
Check out these hot celebrity hair-dos for more hairstyle inspiration!

What's your go to up-do? Tweet us @sofeminineUK
You might also like: